


Greetings Forum Members,
Been awhile since I logged on.
Just a few quick?'s. Would it be beneficial to connect a 3.3V supply to SATA HDD? If was thinking of using the supply from SATA bridge chip pin 44.
Also Has the HDD light issue been resolved. I would rather not remove MOBO to connect a wire to AC19 ballout on Southbridge. I'll try connecting IDE pin 39 to SATA power connector Activity pin first. I intend to buss all the grounds and supplies together per SATA specs also.
Just ordered 3 HP SATA connectors to mod all three of my T43's. Expediency is the order of the day.
Thanks Guys!
Take a look at our
ThinkPads.com HOME PAGE
For those who might want to contribute to the blog, start here: Editors Alley Topic
Then contact Bill with a Private Message
ThinkPads.com HOME PAGE
For those who might want to contribute to the blog, start here: Editors Alley Topic
Then contact Bill with a Private Message
T43p SATA Guide (There are pictures, it's 2020)
-
RealBlackStuff
- Admin Emeritus

- Posts: 23825
- Joined: Mon Sep 18, 2006 5:17 am
- Location: Loch Garman, Éire
Re: T43p SATA Guide (Beware pictures, 56k-ers)
No, the 2.5" SATA drives require only +5V (3.3V gets ignored, even if connected).
If you would read the thread properly, you'll see that the HDD LED has been resolved: http://forum.thinkpads.com/viewtopic.ph ... 03#p666903
You need to remove the mobo anyway to get the SATA chip off, you can NOT do that with the mobo still in the base!
Connecting pin 39 to the SATA connector does NOT work, and should NOT be done.
EDIT: the above only applies to T43/R52 mobos with ATI graphics.
T43/R52 mobos with Intel graphics have a completely different layout "look" (underneath the Southbridge) on the bottom of the motherboard.
I have not been able (yet) to find the matching AC19 point on these Intel boards.
Until further notice, no active HD LED for Intel-based boards.
Last edited by RealBlackStuff on Mon May 14, 2012 7:00 am, edited 1 time in total.
Lovely day for a Guinness! (The Real Black Stuff)
Lenovo: X240, X250, T440p, T480, M900 Tiny.
PS: the old Boardroom website is still available on the Wayback Machine.
Lenovo: X240, X250, T440p, T480, M900 Tiny.
PS: the old Boardroom website is still available on the Wayback Machine.
Re: T43p SATA Guide (Beware pictures, 56k-ers)
I'm not sure how to locate the AC19 pad on the MOBO reverse side. I have the Intel ballout diagram. Do you count the holes on the pcb from A1? (not all are drilled through). I thought I'd use calipers based on spacing specs 1.118 mm ctc.
-
RealBlackStuff
- Admin Emeritus
- Posts: 23825
- Joined: Mon Sep 18, 2006 5:17 am
- Location: Loch Garman, Éire
Re: T43p SATA Guide (Beware pictures, 56k-ers)
Look at the picture in the link in my previous post.
Use the white painted bits of square/lines as a reference point.
Follow the wire that has been soldered on.
Starting above the white square above RN81, it's the 7th row.
Use the white painted bits of square/lines as a reference point.
Follow the wire that has been soldered on.
Starting above the white square above RN81, it's the 7th row.
Last edited by RealBlackStuff on Mon May 14, 2012 7:19 am, edited 1 time in total.
Lovely day for a Guinness! (The Real Black Stuff)
Lenovo: X240, X250, T440p, T480, M900 Tiny.
PS: the old Boardroom website is still available on the Wayback Machine.
Lenovo: X240, X250, T440p, T480, M900 Tiny.
PS: the old Boardroom website is still available on the Wayback Machine.
-
RealBlackStuff
- Admin Emeritus
- Posts: 23825
- Joined: Mon Sep 18, 2006 5:17 am
- Location: Loch Garman, Éire
Re: T43p SATA Guide (Beware pictures, 56k-ers)
For those of you, who are interested in having their own machine(s) SATA-Modded, but do not have the facility to do this yourself,
The Board Room is now offering this SATA-Mod Service.
You can send in either your bare motherboard, or the whole machine (without charger, battery, hard drive and CD drive).
The Board Room is now offering this SATA-Mod Service.
You can send in either your bare motherboard, or the whole machine (without charger, battery, hard drive and CD drive).
Lovely day for a Guinness! (The Real Black Stuff)
Lenovo: X240, X250, T440p, T480, M900 Tiny.
PS: the old Boardroom website is still available on the Wayback Machine.
Lenovo: X240, X250, T440p, T480, M900 Tiny.
PS: the old Boardroom website is still available on the Wayback Machine.
-
EasyMac308
- Freshman Member
- Posts: 100
- Joined: Fri May 11, 2012 5:20 pm
- Location: Kent, WA
Re: T43p SATA Guide (Beware pictures, 56k-ers)
I wish I'd found this before I gave my T43 away... Lack of SATA was my number one complaint.
EasyMac308
MCITP: EDA, MCSE NT, MCSE 2000, A+
Work: Thinkpad T410 / i5-650 / 8GB / 500GB / Win7 Ent x64
Personal: T60 (4:3) / T7200 / 4GB / 500GB / Ubuntu 12.04 <scrap built>
Retired: 570E, T20, T21, T23, T30, T40, T42, T43
MCITP: EDA, MCSE NT, MCSE 2000, A+
Work: Thinkpad T410 / i5-650 / 8GB / 500GB / Win7 Ent x64
Personal: T60 (4:3) / T7200 / 4GB / 500GB / Ubuntu 12.04 <scrap built>
Retired: 570E, T20, T21, T23, T30, T40, T42, T43
-
RealBlackStuff
- Admin Emeritus
- Posts: 23825
- Joined: Mon Sep 18, 2006 5:17 am
- Location: Loch Garman, Éire
Re: T43p SATA Guide (Beware pictures, 56k-ers)
Has anyone done a SATA-mod on a T43/R52 motherboard with Intel graphics?
It works (except the HD-LED), but I'm wondering if the Southbridge on a T43/R52 with Intel GPU gets hotter than one on a modded ATI mobo?
Your observations please.
It works (except the HD-LED), but I'm wondering if the Southbridge on a T43/R52 with Intel GPU gets hotter than one on a modded ATI mobo?
Your observations please.
Lovely day for a Guinness! (The Real Black Stuff)
Lenovo: X240, X250, T440p, T480, M900 Tiny.
PS: the old Boardroom website is still available on the Wayback Machine.
Lenovo: X240, X250, T440p, T480, M900 Tiny.
PS: the old Boardroom website is still available on the Wayback Machine.

Re: T43p SATA Guide (Beware pictures, 56k-ers)
A brief update:
Whether or not the HDD indicator works with the simple wire depends on the HDD, apparently. Using the SATA power pin for activity indication is not always implemented. My T43's 160GB HDD has a fully working activity indicator with the single wire.
Whether or not the HDD indicator works with the simple wire depends on the HDD, apparently. Using the SATA power pin for activity indication is not always implemented. My T43's 160GB HDD has a fully working activity indicator with the single wire.
-
RealBlackStuff
- Admin Emeritus
- Posts: 23825
- Joined: Mon Sep 18, 2006 5:17 am
- Location: Loch Garman, Éire
Re: T43p SATA Guide (Beware pictures, 56k-ers)
What single wire are you talking about?
On the T43/R52 mobos with ATI, you only need the (single) wire on the bottom as shown here: http://forum.thinkpads.com/viewtopic.ph ... 03#p666903.
On the T43/R52 mobos with ATI, you only need the (single) wire on the bottom as shown here: http://forum.thinkpads.com/viewtopic.ph ... 03#p666903.
Lovely day for a Guinness! (The Real Black Stuff)
Lenovo: X240, X250, T440p, T480, M900 Tiny.
PS: the old Boardroom website is still available on the Wayback Machine.
Lenovo: X240, X250, T440p, T480, M900 Tiny.
PS: the old Boardroom website is still available on the Wayback Machine.
-
jack.chesley
- Posts: 4
- Joined: Sun Feb 10, 2008 4:32 am
Re: T43p SATA Guide (Beware pictures, 56k-ers)
Hi,
Midway through a T43 (Intel graphics) mod, I have a few questions, assuming from comments that:
1- The HDD light issue is still not resolved for Intel graphics boards???
2- The Silicon Image chip uses the exact same pins as the Marvell chip to connect the A and B +- lines???. Since I have the oddball intel Graphics where the AC19 southbridge pin-out is different than the Ati board, I worry a bit that other m-board items may also not be exactly the same (like the pins we're discussing). The actual board traces around the chip are NOT identical to the Ati board photo on Moffitt's site, so I'm guessing the best "B" data line solder points would perhaps be at the capacitors circled?? Or, maybe de-solder and pry out just the relevant 4 pins and re-use those solder points???
http://img15.imageshack.us/img15/8865/t ... ilicon.jpg
Um, may I second the comment that this chip is WAAAAAAAAAy smaller than I was expecting. I'm heading to radio shack tomorrow to pick up a new soldering tip that I can file down to a microscopic point!! and, yeah there sure is more dust there than I could see with a magnifying glass (since cleaned up).
Thanks for your help to keep me from destroying my son's prize laptop, nicely pinmodded to 2.26 and with a new battery ... just waiting for an SSD!
-
RealBlackStuff
- Admin Emeritus
- Posts: 23825
- Joined: Mon Sep 18, 2006 5:17 am
- Location: Loch Garman, Éire
Re: T43p SATA Guide (Beware pictures, 56k-ers)
Please change that picture to just a link, it's way too big! Thanks.
1) HD-LED with Intel GPU not solved yet
2) Pinout of the SiliconImage chip is identical to the Marvell chip
On all the ATI and Intel boards that I have seen, the holes above A- and A+ are open (on ATI boards the holes above B- and B+ are also open), not clogged up with paint(?) like on yours.
I use very thin wires (32 AWG) that I found in an ASUS IDE hard disk cable from an old PC motherboard I had.
For more details, see this: http://www.sparepartsnotebook.com/lang- ... cable.html
That wire is thin enough to go through those holes, and I then solder it on the bottom of the mobo.
On Intel mobos I solder B+ and B- to the (circled) capacitors above them.
Lovely day for a Guinness! (The Real Black Stuff)
Lenovo: X240, X250, T440p, T480, M900 Tiny.
PS: the old Boardroom website is still available on the Wayback Machine.
Lenovo: X240, X250, T440p, T480, M900 Tiny.
PS: the old Boardroom website is still available on the Wayback Machine.
-
jack.chesley
- Posts: 4
- Joined: Sun Feb 10, 2008 4:32 am
Re: T43p SATA Guide (Beware pictures, 56k-ers)
RealBlackStuff
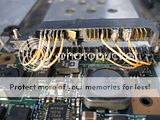
Thanks for the info. I used a needle to clean out the paint a bit, but since I did not have the option for HD activity light, I worked from the top of the motherboard using a soldering tip filed to a needle point (and a jewelers loupe to see the teeeeeeny tiny connections). Here is an album of some pics in the process, hopefully it will help another to get confidence to try it. I used a 30 gauge solid wire IDE cable for the data and larger stranded wire to go to IDE pins 42 and 43 for 5v and ground (looped around several SATA data and power ground pins). I also used some hot glue to anchor the data line to the top of the disabled PATA bridge chip.
http://imageshack.us/g/69/img0362ob.jpg/
and.....
Since this is an Intel graphics board, I'd be will to try to help with this question if you want to post the test parameters you're interested in.Has anyone done a SATA-mod on a T43/R52 motherboard with Intel graphics?
It works (except the HD-LED), but I'm wondering if the Southbridge on a T43/R52 with Intel GPU gets hotter than one on a modded ATI mobo?
Your observations please.
-
RealBlackStuff
- Admin Emeritus
- Posts: 23825
- Joined: Mon Sep 18, 2006 5:17 am
- Location: Loch Garman, Éire
Re: T43p SATA Guide (Beware pictures, 56k-ers)
I see you have left the SATA-chip in place, and just ground off the four A+/A-/B-/B+ pins.
When you run the machine now, does the big Intel chip next to it get just warm or almost finger-burning hot?
When you run the machine now, does the big Intel chip next to it get just warm or almost finger-burning hot?
Lovely day for a Guinness! (The Real Black Stuff)
Lenovo: X240, X250, T440p, T480, M900 Tiny.
PS: the old Boardroom website is still available on the Wayback Machine.
Lenovo: X240, X250, T440p, T480, M900 Tiny.
PS: the old Boardroom website is still available on the Wayback Machine.
-
JasonTekNut
- Posts: 3
- Joined: Mon Aug 06, 2012 12:54 pm
- Location: Charleston, South Carolina
Re: T43p SATA Guide (Beware pictures, 56k-ers)
Hi All,
I decided to take the plunge and perform the SATA conversion on my T43 2686-E7U. It's been my daily computer for 7 years, so perhaps it was unwise to try this.
First, I want to third the opinion that the SATA-PATA chip is really REALLY small. If you want to do this conversion cleanly, you will need a micro soldering iron. A fine tipped pencil iron won't do the trick.
I decided to use the existing PATA traces that run back to the chip, and then just jump from those pins to the SATA pins. I tried to unsolder the converter chip using a soldering iron, but this was completely fruitless. I tried to cut the traces with a razor blade, but the chip still would not come off. It turns out that the chip is bonded to the mainboard in the center and cannot be removed without a heat gun. I demolished most of the chip with a screwdriver.
Unfortunately, I caused some carnage with the razor blade. Some of the traces actually pass THROUGH where the chip's pins touch down. By cutting the traces, you sever that throughput. I DO NOT recommend cutting the traces.
I would also like to note that the HP connector does NOT fit perfectly over the existing pegs. I had to trim off one of the ends with a file and drill a new hole in the connector bracket. The other hole *does* align the connector perfectly, however.
Ok, now comes the frustration.
The system powered up the first time and showed the drive in the BIOS. However, this lasted only a short time. Now, with the WIFI chip removed, the BIOS will POST, but the drive doesn't appear. With the WIFI chip in place, there is no POST. The screen remains dark. Periodically, the system decides to work. I can't figure out why.
I've spent three full days trying to resurrect this machine, cleaning the traces, rewiring everything, but I believe my beloved T43 is dead. I cried over it.
Anyway, I now have a T43 for sale to anyone who has better tools and knowledge than me.
This system is in LIKE NEW condition. No scratches. The keyboard barely shows any use. The hinges are tight. It's in beautiful shape.
Here are the specs:
Machine Type: 2686-E7U
Processor: Pentium M 1.87GHz
RAM: 2GB
Intel Wifi a/b/g
Bluetooth Upgraded Modem Chip - and also a few more spares and the original modem ($50 value at least)
Fingerprint Reader
DVD Burner
Two Docking Stations
Three Power Adapters
14" screen 1440x1050
ATI Radeon X300 64MB
No Hard Drive
Botched SATA conversion job
Or, if you have an idea of how to fix this sad machine, let me know. Thank you.


-
RealBlackStuff
- Admin Emeritus
- Posts: 23825
- Joined: Mon Sep 18, 2006 5:17 am
- Location: Loch Garman, Éire
Re: T43p SATA Guide (Beware pictures, 56k-ers)
I could have saved your machine AND you a lot of aggro, if you'd sent it to me....
Sorry to hear of your troubles, but frankly, I'm not surprised.
Motherboards are not just one layer of board material with contact lines printed on top and bottom.
They consist of several layers with contacts in between.
By using the crude grinding/cutting away, you also damaged one or more of the inner layers.
Nobody in their right mind would use a soldering iron of any size to remove such a small SATA chip!
Only heatguns or solder rework stations are suited to remove that chip.
This chip is not bonded on the bottom, but soldered.
That's why you need to first heat up the bottom (at the SATA spot), then turn the mobo over and heat up the chip from above, before you can remove it.
This has all been described earlier on in this thread.
Also that the HP connector needs to be modified with a new hole and be shortened.
You also made a mistake in soldering the ground wires on the SATA connector.
Starting from the left in the 15-pin group, you should solder pins 4-5-6 together and connect to ground (old IDE pin 40). 7-8-9 together, connect to +5V (old IDE pin 42). You need to unsolder 10-11-12, because only 10 and 12 are ground! No need to connect these to ground.
11 is the HD-LED on some drives, but not in a T43/R52 (this may be another cause of your non-boot problems).
As to what caused the rest of your problem: it was your cutting away at the mobo while probably putting on way too much pressure, thus flexing it well beyond its limits.
With the result that now the Southbridge (Intel chip under the wifi card) has become "unstuck".
There are roughly 650 solder balls under that Southbridge, and when just ONE disconnects, you've got the disaster you experience.
The only way to fix it, is by replacing the motherboard.
Lovely day for a Guinness! (The Real Black Stuff)
Lenovo: X240, X250, T440p, T480, M900 Tiny.
PS: the old Boardroom website is still available on the Wayback Machine.
Lenovo: X240, X250, T440p, T480, M900 Tiny.
PS: the old Boardroom website is still available on the Wayback Machine.
-
JasonTekNut
- Posts: 3
- Joined: Mon Aug 06, 2012 12:54 pm
- Location: Charleston, South Carolina
Re: T43p SATA Guide (Beware pictures, 56k-ers)
RealBlackStuff,
Thank you for your advice. If you look closely, Pin 11 is connected to IDE Pin 40, and power and ground already wired as you suggested. I thought that the Pin 11 wire might be causing an issue, so I removed it. This had no affect.
I also noted that there is a 20 ohm resistance in the traces to the PATA pins, so I did a direct line-fly. No affect.
I guess it's game over? Should I try to liquidate the components?
-
RealBlackStuff
- Admin Emeritus
- Posts: 23825
- Joined: Mon Sep 18, 2006 5:17 am
- Location: Loch Garman, Éire
Re: T43p SATA Guide (Beware pictures, 56k-ers)
Pin 11 should NOT be connected at all!
Pins 10 and 12 may, but need not be connected to ground.
And your ground is only to pin 5, it needs to be all three pins 4-5-6.
Can't see exactly what old IDE pins you connected to, that junk old connector should not be there at all!
You may have crossed/shorted old IDE pins by leaving them old connector wires still there...
You can try to sell the whole carcass in our Marketplace forum, or part it out for probably a bit more money.
Lovely day for a Guinness! (The Real Black Stuff)
Lenovo: X240, X250, T440p, T480, M900 Tiny.
PS: the old Boardroom website is still available on the Wayback Machine.
Lenovo: X240, X250, T440p, T480, M900 Tiny.
PS: the old Boardroom website is still available on the Wayback Machine.
-
malch
- Freshman Member
- Posts: 67
- Joined: Mon Aug 06, 2012 5:35 pm
- Location: Langley B.C. Canada
- Contact:
Re: T43p SATA Guide (Beware pictures, 56k-ers)
Got the M/B out of the case. When I feel up to it,I will remove the chip. Waiting for the sata connector .
The pata connector is on a spacer it looks like .
Posting here because I'm doing the sata mod and this thread is not stickyed .
The pata connector is on a spacer it looks like .
Posting here because I'm doing the sata mod and this thread is not stickyed .
Conseil des pharmaciens www.viagrasansordonnancefr.com France sans maladie
-
malch
- Freshman Member
- Posts: 67
- Joined: Mon Aug 06, 2012 5:35 pm
- Location: Langley B.C. Canada
- Contact:
Re: T43p SATA Guide (Beware pictures, 56k-ers)
The chip isnt glued to the M/B-it's soldered!
A nice little square patch of solder in the middle of the chip.
That means anybody trying to clip all the leads and lifting the chip off the M/B are doomed to failure.
A nice little square patch of solder in the middle of the chip.
That means anybody trying to clip all the leads and lifting the chip off the M/B are doomed to failure.
Conseil des pharmaciens www.viagrasansordonnancefr.com France sans maladie

Re: T43p SATA Guide (Beware pictures, 56k-ers)
Indeed it is.malch wrote:The chip isnt glued to the M/B-it's soldered!
My understanding - which may be incorrect - is that once you've cut the "legs"/"leads" there's no need to physically remove the chip.A nice little square patch of solder in the middle of the chip.
That means anybody trying to clip all the leads and lifting the chip off the M/B are doomed to failure.
...Knowledge is a deadly friend when no one sets the rules...(King Crimson)
Cheers,
George (your grouchy retired FlexView farmer)
One FlexView to rule them all: A31p
Abused daily: T520, X200s
PMs requesting personal tech support will be ignored.
Cheers,
George (your grouchy retired FlexView farmer)
One FlexView to rule them all: A31p
Abused daily: T520, X200s
PMs requesting personal tech support will be ignored.
-
RealBlackStuff
- Admin Emeritus
- Posts: 23825
- Joined: Mon Sep 18, 2006 5:17 am
- Location: Loch Garman, Éire
Re: T43p SATA Guide (Beware pictures, 56k-ers)
Correct, but make sure none of the 'severed' legs are contacting another leg!
Lovely day for a Guinness! (The Real Black Stuff)
Lenovo: X240, X250, T440p, T480, M900 Tiny.
PS: the old Boardroom website is still available on the Wayback Machine.
Lenovo: X240, X250, T440p, T480, M900 Tiny.
PS: the old Boardroom website is still available on the Wayback Machine.
-
malch
- Freshman Member
- Posts: 67
- Joined: Mon Aug 06, 2012 5:35 pm
- Location: Langley B.C. Canada
- Contact:
Re: T43p SATA Guide (Beware pictures, 56k-ers)
So..Using the FWHD56.ISO file.
"Please connect the AC adapter and use a fully charged battery to power the ThinkPad system during the update. This will avoid an accidental lost of power. Note: Install only one hard drive into your ThinkPad.
Place the CD-R or CD-RW disc you created in Making a CD-R or CD-RW disc to use section into your ThinkPad optical disc drive.
Boot the system with the firmware update utility.
Drives that have been detected will be listed in the upper area of the Main Menu.
A blinking mark to the left of the drive listed indicates that an update is required.
No blinking mark to the left of the drive listed indicates that the hard drive has latest firmware and there is no need to update, or the firmware update is not for valid for your drive. Remove the firmware update utility and shutdown your ThinkPad.
Follow the instructions on the screen to update the necessary drives.
When the installation is complete, remove the firmware update utility CD or CD-RW from the optical disc drive and power off your ThinkPad system."
Is this the right ISO [FWHD56.ISO] for SATA?
Can I do this on my desktop ?
Conseil des pharmaciens www.viagrasansordonnancefr.com France sans maladie
-
malch
- Freshman Member
- Posts: 67
- Joined: Mon Aug 06, 2012 5:35 pm
- Location: Langley B.C. Canada
- Contact:
Re: T43p SATA Guide (Beware pictures, 56k-ers)
Which do you think is less risky, the hard drive flash or the M/B flash?
I have experience with desk top bioses but not this.
I have experience with desk top bioses but not this.
Conseil des pharmaciens www.viagrasansordonnancefr.com France sans maladie
Re: T43p SATA Guide (Beware pictures, 56k-ers)
The firmware is applicable to the particular drive manufacturer, not the SATA/PATA aspect.malch wrote:
Is this the right ISO [FWHD56.ISO] for SATA?
No.Can I do this on my desktop ?
...Knowledge is a deadly friend when no one sets the rules...(King Crimson)
Cheers,
George (your grouchy retired FlexView farmer)
One FlexView to rule them all: A31p
Abused daily: T520, X200s
PMs requesting personal tech support will be ignored.
Cheers,
George (your grouchy retired FlexView farmer)
One FlexView to rule them all: A31p
Abused daily: T520, X200s
PMs requesting personal tech support will be ignored.
-
malch
- Freshman Member
- Posts: 67
- Joined: Mon Aug 06, 2012 5:35 pm
- Location: Langley B.C. Canada
- Contact:
Re: T43p SATA Guide (Beware pictures, 56k-ers)
Thank you for replying.I must be getting tiresome with all the questions.
I soldered the 6 wires onto the Marvell chip pad. very fiddly.
I am leaning towards the M/B bios flash for the HD [somewhat depends on what Emilio says],
since there is no Lenovo HD list for sata HDs on a T43P..
I soldered the 6 wires onto the Marvell chip pad. very fiddly.
I am leaning towards the M/B bios flash for the HD [somewhat depends on what Emilio says],
since there is no Lenovo HD list for sata HDs on a T43P..
Conseil des pharmaciens www.viagrasansordonnancefr.com France sans maladie
-
RealBlackStuff
- Admin Emeritus
- Posts: 23825
- Joined: Mon Sep 18, 2006 5:17 am
- Location: Loch Garman, Éire
Re: T43p SATA Guide (Beware pictures, 56k-ers)
There are only 4 wires to be soldered to the former chip site, NOT 6!
Lovely day for a Guinness! (The Real Black Stuff)
Lenovo: X240, X250, T440p, T480, M900 Tiny.
PS: the old Boardroom website is still available on the Wayback Machine.
Lenovo: X240, X250, T440p, T480, M900 Tiny.
PS: the old Boardroom website is still available on the Wayback Machine.
-
malch
- Freshman Member
- Posts: 67
- Joined: Mon Aug 06, 2012 5:35 pm
- Location: Langley B.C. Canada
- Contact:
Re: T43p SATA Guide (Beware pictures, 56k-ers)
6 wires LOL seeing if you were on your toes!
Pics or I didnt do it
http://s873.photobucket.com/albums/ab298/epilamer/T43P/
Looks kind of rough close up. Happen to have a stereo macro/microscope so I checked all connections, Then flooded it with clear c/b sealer.
Pics or I didnt do it
http://s873.photobucket.com/albums/ab298/epilamer/T43P/
Looks kind of rough close up. Happen to have a stereo macro/microscope so I checked all connections, Then flooded it with clear c/b sealer.
Conseil des pharmaciens www.viagrasansordonnancefr.com France sans maladie
-
malch
- Freshman Member
- Posts: 67
- Joined: Mon Aug 06, 2012 5:35 pm
- Location: Langley B.C. Canada
- Contact:
Re: T43p SATA Guide (Beware pictures, 56k-ers)
It worked! Got a screen telling me that the date and time were wrong AND a 2010 error .
So I'll take some of the top off for some pics and heatsink mods.
Waiting for a pata Ultrabay and I'll clone it.
So I'll take some of the top off for some pics and heatsink mods.
Waiting for a pata Ultrabay and I'll clone it.
Conseil des pharmaciens www.viagrasansordonnancefr.com France sans maladie
-
malch
- Freshman Member
- Posts: 67
- Joined: Mon Aug 06, 2012 5:35 pm
- Location: Langley B.C. Canada
- Contact:
Re: T43p SATA Guide (Beware pictures, 56k-ers)
Just to say Thank you to Bibin for the idea,and
RBS for the HD light wiring.
RBS for the HD light wiring.
Conseil des pharmaciens www.viagrasansordonnancefr.com France sans maladie
-
RealBlackStuff
- Admin Emeritus
- Posts: 23825
- Joined: Mon Sep 18, 2006 5:17 am
- Location: Loch Garman, Éire
Re: T43p SATA Guide (Beware pictures, 56k-ers)
To put things in perspective: the SATA mod was first performed in China in 2007(!), then published on the (very inventive) 51nb forum: http://forum.51nb.com/viewthread.php?tid=575290
From there it "came to the West" albeit many years later, and the rest is history.
From there it "came to the West" albeit many years later, and the rest is history.
Lovely day for a Guinness! (The Real Black Stuff)
Lenovo: X240, X250, T440p, T480, M900 Tiny.
PS: the old Boardroom website is still available on the Wayback Machine.
Lenovo: X240, X250, T440p, T480, M900 Tiny.
PS: the old Boardroom website is still available on the Wayback Machine.
-
- Similar Topics
- Replies
- Views
- Last post
-
-
How new my laptop really needs to be? A guide to modern computing
by mikemex » Wed Jan 31, 2024 2:57 pm » in Off-Topic Stuff - 9 Replies
- 3400 Views
-
Last post by mikemex
Sun Feb 11, 2024 3:14 pm
-
Who is online
Users browsing this forum: No registered users and 33 guests