


So, after some discussions in various threads here, and later the delay of the promised RetroThinkpad, I started working on my vision, which is a classic 4.3 Thinkpad with modern internals. I soon decided that the "frame" where I most likely would be able to fit custom components would be a 770. I also figured that the Raspberry Pi2 would be the best choice, as this has the most accessories available for it. To run the LCD, I would use a HDMI to VGA adapter board. And make no mistake; we're not looking into a computer with super specs here. The older Raspberry Pi was said to have the same processing power as a 300MHz PII CPU, while the Pi2 is supposed to be better. Still by no means on par with a modern laptop, but definitely able to do more than the standard 770.
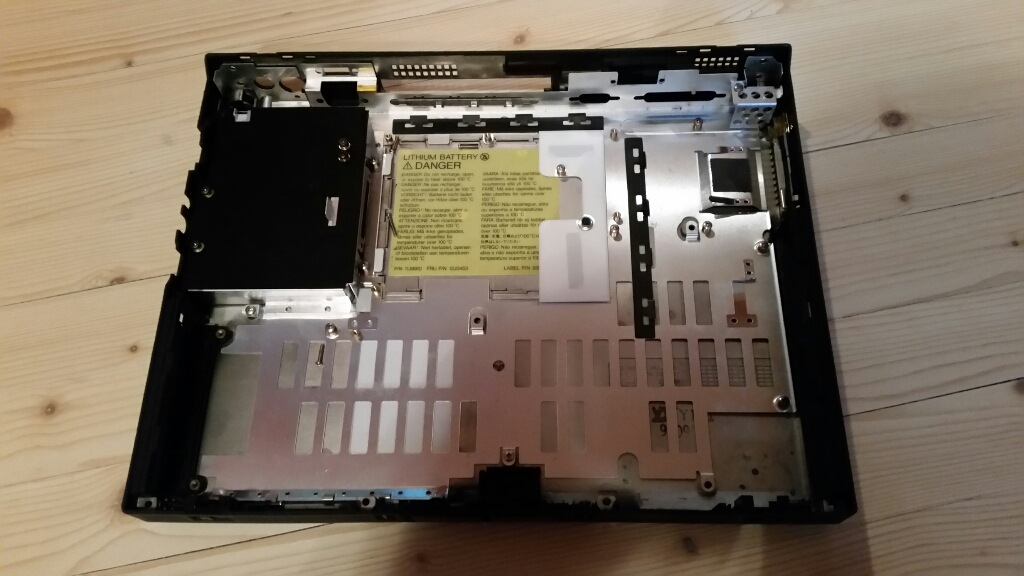
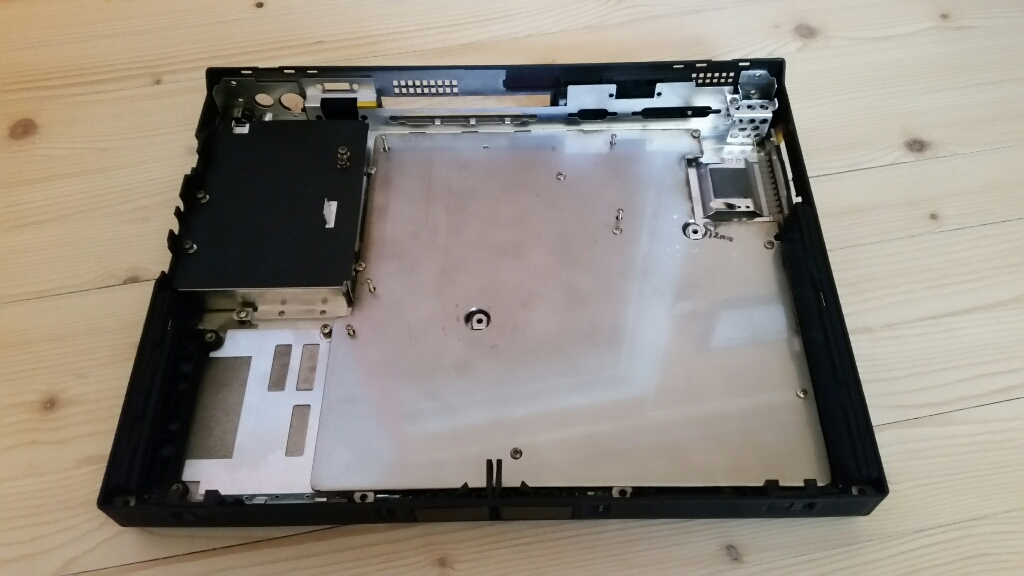
So I purchased a non-functional but decent looking 770 from forum member Neil (Thanks Neil!) and ripped all the internals out. What I was left with was this:
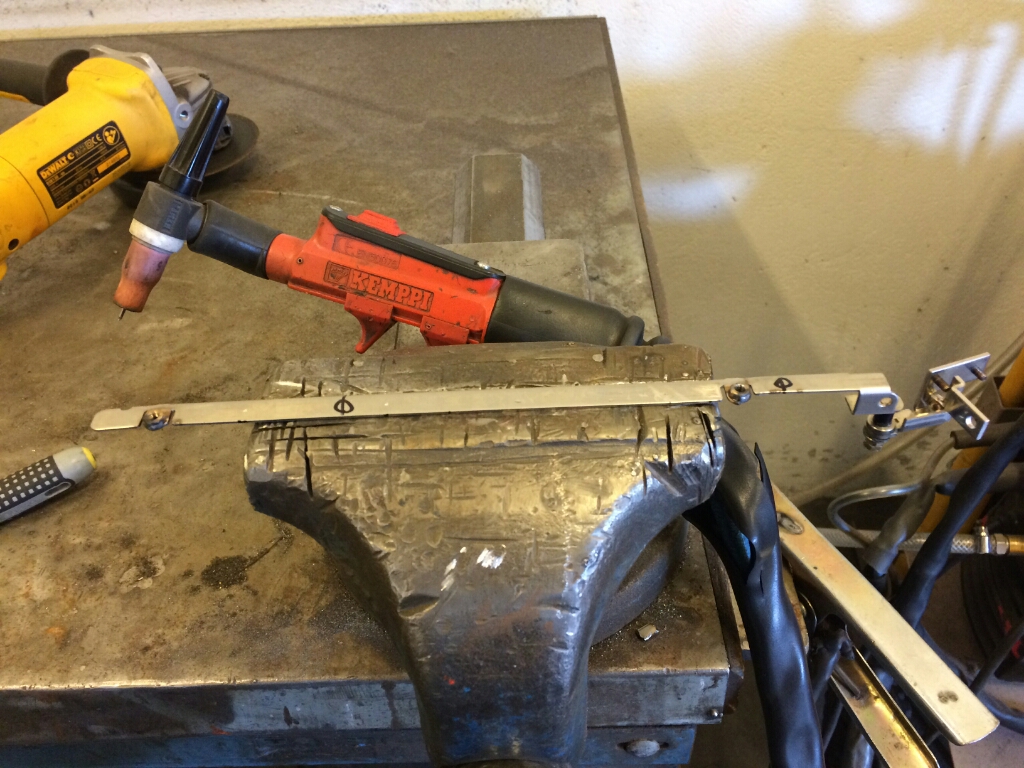
Then I cut and shaped a steel base plate for installing the components on:

and securely attached it to the base with the original screws in the original screw holes:
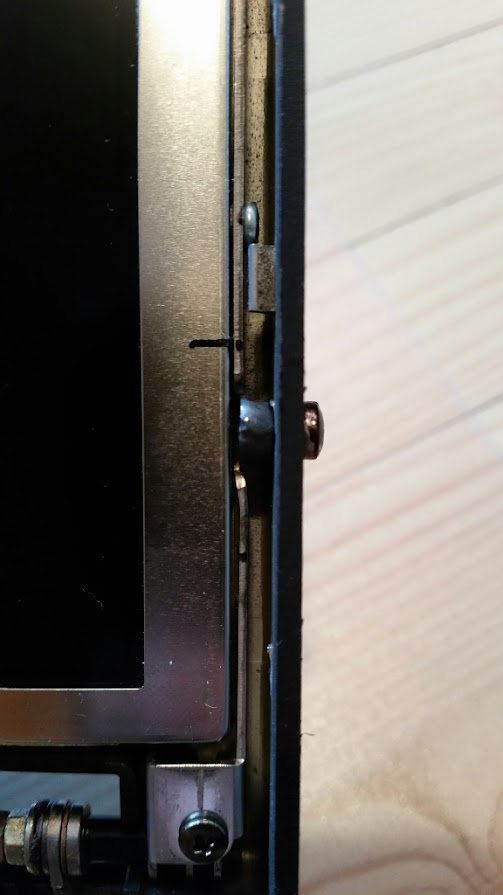
So far so good. Unfortunately I made a mistake when I purchased a 13.3" 770. My original plan was to install a T60 14.1" SXGA panel, which is easy to find and has a decent picture. But I found out that the 13.7" and 14.1" 770 units are different than the 13.3" ones. They have a bigger lid, hence the forward leaning front, and a 14.1 LCD could not be fitted in my unit without changing the whole case. To further complicate things, it turned out that no LCD adapter was available for the ancient type of LCD that the 770 had. So I had to purchase a 13.3" panel from a 600, which has different attachments than the original one. So I had to bring the hinges to work and do some drilling and TIG welding to make it work. Not the usual tools for your Thinkpad projects..
The only part of this mod visible from the outside is two screws on the right hand side of the lid. Apart from that, it turned out to fit just perfect:
So the time was finally there to do a full scale test of the components with the LCD panel installed. And it turned out to work, and Raspbian booted up and behaved just fine. I have later installed the LCD bezel, so it looks more complete than in the picture:
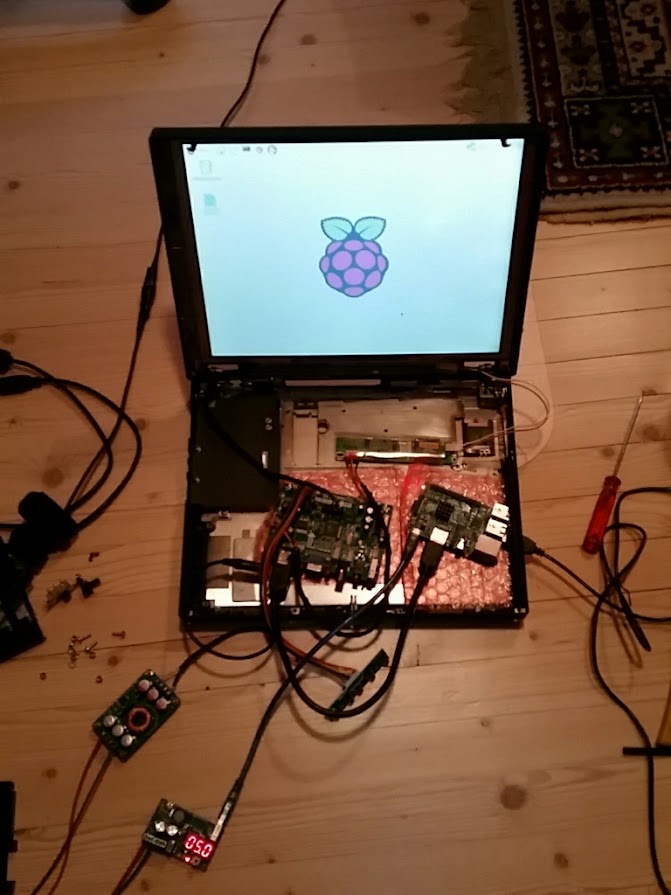
Note that I use two DC converters; one 5V DC for the Raspberry and one 12V DC for the LCD adapter. To feed them, I use the standard IBM 16 volt adapter, and I have made a bracket so that the standard receptacle will be installed in it's correct location. I have also bought a main switch that hopefully can be used with the 770's sliding power switch, so it looks as standard as possible from the outside.
So the main task that's left is to position all the components on the base plate, and run cables between them. Components like the LCD adapter's button panel will probably go in the battery opening, while I'll probably just glue the CD-ROM faceplate in place. Speakers will be installed in their standard location. So some hours of work left still. Right now I'm in the US, so nothing much will be happening the next weeks, but hopefully it will be up and running sometime this (late) summer or fall. Maybe it'll even be finished before the official RetroThinkpad.
'What about the keyboard?' you might ask. And here is the only thing I won't reveal quite yet. Thanks to member Ilakast, I got a spare keyboard with a bezel / palmrest unit, and I was able to make a working prototype of my idea for the full scale test. But the "production" version isn't ready yet, so that's for later.
Stay tuned!


