


Rev: 1.1 - 8/Apr/2019
WARNING: There are 60 images in this thread!
This guide was originally compiled for personal use, but made public to help those who wish to install Mojave 10.14.
It was first put together after reading that John McDonnell would no longer be supporting MacOS due to the way in which the OS has been built as well as having personally spent time collating various resources and combining them in a unique way to create a successful install process.
The following text, quoted in full from his page on Mojave explains John McDonnell's decision.
"MacOS Mojave 10.14 on the ThinkPad X220
With the release of macOS Mojave 10.14, Apple ended support for their own notebook models with specifications comparable to the ThinkPad X220.
Apple’s transition to the Metal graphics framework involved depreciating OpenGL and OpenCL. The Intel HD Graphics 3000 found in the X220 as well as MacBook Pro and MacBook Air models produced before 2012 is not compatible with Metal.
While Mojave can run on the X220 by patching in graphics kexts from previous versions of macOS as detailed in the guides listed below, we believe the lack of native graphic support in Mojave makes this an appropriate time for us to stop creating new guides for installing macOS on the X220.
We hope you understand this decision. All of our existing guides will remain where they are and we will continue to provide support for these versions of macOS on the X220 into the foreseeable future."
IMPORTANT INFORMATION
Please be aware that the linked patcher tool WILL work with Mojave 10.14.4 thanks to an updated version being released
The associated link for this tool has been updated.
Legacy versions of the patch tool ARE available from the source @ http://dosdude1.com/mojave/archive/
Thanks go to forum member "Adamantium" for bringing to my attention the fact that the originally linked patcher tool would not work with 10.14.1 or 10.14.2 versions of Mojave.
ABOUT THIS GUIDE
This guide is intended as just that, a guide (not a "how-to") and is specific to X220 & T420.
It has not been tested extensively across other machines, nor is it intended be exhaustive. It has, however been proven to work with Lenovo X220 and Lenovo T420 machines as each machine was put through at least five installations to prove out, check and where necessary, improve the outlined steps/procedures.
(If anyone is running on other platforms/machines, I would like to hear from you to update the “Known to work on” list)
Whilst not intended to be an “Everything you need” guide, every attempt has been made to supply and include any and all basic and relevant information inclusive of links to specific resources where-ever and whenever possible as well as include useful steps for greater ease of use.
This guide has been compiled and completed due to the help of a number of sources and practical experience. Therefore I only take credit for writing, adding in some steps that I have personally undertaken, inclusion of additional information and/or finalising the steps within this guide during the install process. Where information based on a particular individuals work or that of an outside source is included, those individuals/sources are credited.
The various sources used in compiling this guide are listed at the end in an effort to give credit where credit is due. Without these sources and/or individuals, this guide would not have been possible. So to those people, and those sources I say thank-you for the work you have completed to date.
This guide is based on a FRESH install (new install on a blank drive), not an upgrade from High-Sierra or previous MacOS variants.
Important Notes
For the sake of this guide it is assumed that since you intend to install MacOS on your system, you are aware of the need to, and that you have already, flashed your bios with the necessary updated BIOS version to remove the whitelist checks and permit installation of a macOS suitable Wi-Fi card. Failure to update your BIOS can or will result in your WiFi card NOT working under MacOS as a result, with no ability to change it for a suitable one due to the whitelist BIOS checks. It is your own responsibility to source and use an updated BIOS.
Completing the final install steps after the main install REQUIRES an internet connection. If your Wifi does not work, your Ethernet (probably) will if you used the recommended kext, so you may need, or will need, to hook up an ethernet lead between your computer/laptop and your router if you have not flashed your BIOS.
It is your own responsibility to ensure you carry out any and all prerequisite work ahead of attempting any install (BIOS flash for example) and your own responsibility to ensure suitability of system prior to install.
IF YOU ARE UNSURE THAT YOU ARE CAPABLE OF THIS INSTALL ON YOUR OWN, OR ANY OF THE STEPS OUTLINED WITHIN THIS GUIDE, DO NOT ATTEMPT TO FOLLOW IT WITHOUT SECURING THE ASSISTANCE OF SOMEONE THAT IS CAPABLE OF SUCH AN INSTALL AND WHO IS WILLING TO ASSIST YOU.
NO LIABILITY IS, OR WILL BE, ASSUMED BY THE WRITER OF THIS GUIDE FOR ANY REASON WHATSOEVER, AT ANY TIME, NOW OR IN THE FUTURE. YOU HAVE BEEN DULY NOTIFIED AND WARNED!
Ensure you are fully awake AND fully sober(!!!) when attempting to follow this guide to installing MacOS Mojave. Do NOT attempt such an install as this if you are not sober or you are tired as mistakes are easily made under such circumstances.
If you are currently running High-Sierra, it is considered best-practice to make a full and entire back-up (either by imaging the drive or cloning it) to ensure no loss of data and/or no down time due to a failed install.
YOU HAVE BEEN WARNED!
Questions to answer:
1) Is your Machine MacOS Suitable?
2) Can your machine run Mojave?
3) Do you have, or have you installed, a MacOS compatible WiFi card?
In short, if you have run High-Sierra on your machine and you have a MacOS compatible WiFi-card, you should be able to run Mojave, but always check first as this may not always be the case.
If you are UNSURE, it is suggested and recommended that you check with any of the forums dedicated to MacOS.
The key to success is to research your machine and/or specific machine specs BEFORE attempting an install.
================
Prerequisites:
1) Flashing the BIOS with a suitable version to remove the whitelist check and permit installation of a macOS suitable Wi-Fi card. (It is assumed you have already done this)
2) Obtaining a MacOS Suitable WiFi Card.
3) Knowing how to change your Wifi card and what that entails, as well as having the necessary tools, skills and knowledge of your machine to do so.
4) Obtain a copy of the MacOS Mojave Patcher From DOSDude (https://ipfs.io/ipfs/QmT7r7bnuXqkx93voJ ... atcher.dmg)
5) Obtain a copy of the “ThinkPad X220 macOS 10.13 Utility and Kext Pack” from McDonnelltech (http://www.mcdonnelltech.com/X220_macOS ... 8.2018.zip)
6) Obtain a copy of the “IntelMausiEthernet-v2-2018-0424” ethernet kext from RehabMan https://bitbucket.org/RehabMan/os-x-int ... downloads/
Direct file link >> https://bitbucket.org/RehabMan/os-x-int ... 8-0424.zip
7) Obtain a 16GB (or larger) USB Pen drive
8 ) USB windows installation drive (recommended) OR Securing the use of a secondary machine running Windows.
If you use an Atheros AR92xx (Dell 1515) WiFi Card, you will need an additional kext pack, Avaiable from:
Github user “Black-Dragon” https://github.com/black-dragon74/ATH9KFixup/releases
Direct Download: https://github.com/black-dragon74/ATH9K ... ELEASE.zip
9) To Solve the USB 3 issue, see Post #9 by Forum Member "abstracks". Here is the quick link to that post >> Post #9 USB 3 issue Resolution
================
There are a couple of BIOS settings to deal with before doing anything else, or even starting the install. These should be done FIRST to save time later!
(These changes are repeated further down, should anyone skip ahead, or miss this step).
1) Restart your machine, and immediately hit “F1” (or the key required) To enter your BIOS screen
2) Go to Config and ensure “power on with AC attach” is DISABLED
3) Whilst in config, Set “Serial ATA” to “AHCI” mode
4) Go to “Security” and check that Memory Protection>Execution Prevention is ENABLED
5) Go to "Startup" and ensure that UEFI/Legacy option is set to “Both”
6) (Optional Step) Whilst in startup, check the “Boot Sequence” and set your chosen install medium as the first boot device (USB FDD or USB HDD usually).
7) Hit F10 (or the correct key to your system) to save settings and reboot.
Now that is out of the way, we can look toward creating your USB installation media.
================
Step1: Creating your MacOS Mojave USB install drive
Creating the USB Installer from within MacOS (Recommended method)
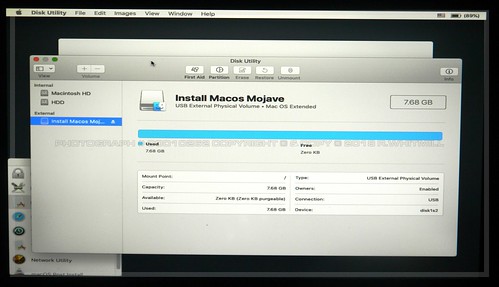
1) Insert your 16GB, or larger, USB disk
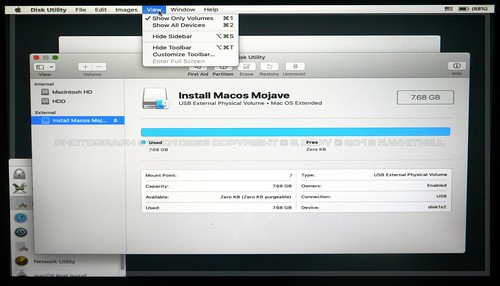
2) Open Applications > Utilities > Disk Utility
~ Select the USB disk in the left pane (select the physical disk, not a volume on the disk)
~ Click the Erase" button at the top of the window
~ Under "Name" type "Install MacOS Mojave"
~ Under "Format" select "Mac OS Extended (Journaled)"
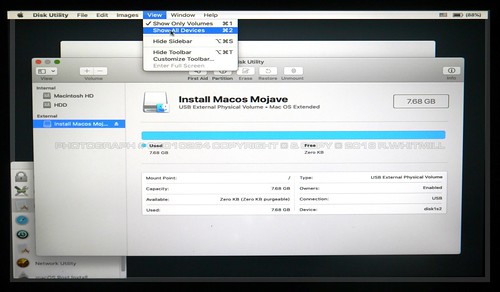
~ Under "Scheme" select "GUID Partition Map" (If the "Scheme" option is not visible, go to the "View" menu and select "Show All Devices")
~ Click "Erase"
3) With the USB Pen drive prepared, Run the previously downloaded “MacOS Mojave Patcher” to enable downloading of the Mojave installer app.
Running the "MacOS Mojave Patcher"
Here is a short video (under 2 minutes) of the process for those that like short-cutting written descriptions >>> https://youtu.be/tUgcpBsV8jc
1) With the Mojave Patcher open and the active item, Click on the “Tools” tab in the menu (at the top of your screen) and select “Download macOS Mojave”. (MacOS Shortcut is "Command key + D" On a Windows based machine, the Command key is the "Alt" key next to the spacebar).
2) You will then be presented with a mini drop-down containing the following message:
Download macOS
This will begin downloading macOS directly from
Apple servers. This is about a 5GB download, and will
take quite some time to complete, depending on your
Internet connection speed. Would you like to proceed?
You are given two option buttons below that entitled “Cancel” and “Yes”
Click on the “Yes” option and a new window will open, giving you the opportunity of choosing where to locate the download. It is recommended to download to “Desktop” as it makes it easy to locate, however where to save it is your own choice.
Once you have chosen your download location, simply click on the “Select save location” button to continue.
A small window-bar will open showing, initially, that it is “Downloading RecoveryHDMetaDMG.pkg” (don’t worry, this changes as the download progresses) with a rolling counter in the bottom right hand corner showing how many MB (Not GB!) has been dowloaded. As an example, it will read “188.7/6508.2 MB” where the 188.7 progressively rolls into higher digits until download completion.
Whilst the download is progressing, go grab a drink. Tea, Coffee or a glass/can of Soda (Pop in the UK) or just grab a drink of choice (NOT ALCHOHOL!!) and park in front of a good half-hour long program on the TV. Don’t get too into it though, there is a USB installer to create. If needs be, set an alarm to go off 30 minutes from the time you initiate the download. Hopefully, the download of the Mojave installer should be finished by then
================
After the download completes, you will be presented with a drop down window that states the following:
Download Complete
macOS has successfully downloaded, and has been
saved to "[yoursavelocation]". Would you like to
use this app to create a patched USB installer drive now?
You are given two option buttons below that are entitled “Not Now” and “Yes”
Choose the “Yes” option to continue.
It will then flash a message of “Successfully confirmed as InstallMacOSMojave”.
Click “ok” and when that message disappears, click on the little dropdown menu below the HDD image and choose the USB Pen drive you prepared earlier entitled “Install MacOS Mojave"
Click on “Start Operation” to begin the task of creating your USB Installer. This will result in a drop down window showing the following:
Warning
All contents on the disk "Install Macos Mojave" will be
erased. Are you sure you want to continue?
With two option buttons entitled “Yes” and “Cancel”.
Click on “Yes” to continue. This will call a security window that requires you to enter your password to continue. Simply do so, click “OK” and continue.
Note: The process to create the installer can and will take "a while" to process. I say “A while” as the time varies between machines.
Whilst you wait for it to complete consider grabbing some food, you’ll thank yourself later for eating whilst you had the chance.
================
Continuing the creation of your installation media
With the basic creation of the installer complete, there are some required additional steps. These are listed below.
1) Unzip, then open the “ThinkPad X220 macOS 10.13 Utility and Kext Pack” folder
2) Launch "Clover Configurator" from the “ThinkPad X220 macOS 10.13 Utility and Kext Pack” folder
3) Once Clover is launched, click on the “Mount Partition” option next to the EFI partition of your USB. It should appear as EFI on EFI, Install macOS Mojave (diskXs1) (where X represents your disk number). It may ask for your password. If so, enter your password and click on “Continue”[/size]
4) Once the EFI partition is mounted, quit clover completely (Right click on the clover icon in the dock, then choose the “Quit” option)
5) Copy the ENTIRE EFI FOLDER from the Utility and Kext Pack (Right click “Copy”)
6) Open the EFI folder on your USB drive and then paste the complete EFI folder from the Kext Pack (Right click “Paste”). If it asks you what to do, choose the “Replace” option.
7) Check that The EFI partition on your USB contains a single folder named EFI. Inside this EFI folder should be two folders: BOOT and CLOVER
8 ) Add any and all additional kext files you may need BEFORE ejecting the USB. (See notes 2, 3, 4, 5 & 6 below beforeejecting the USB Pen Drive)
9) Once any additional/replacement kexts are installed, Safely eject your USB drive (Right click ”Eject” on the icon from the desktop if you have your drives showing).
10) DO NOT LOSE OR OVERWRITE THIS INSTALLATION USB! Put it somewhere SAFE! HINT>> Hang it on a keyring, then onto the belt loop of your Trousers/Jeans (Pants to our U.S Cousins).
Notes:
1) If you are updating your system from a previous MacOS install, ensure to back-up ALL of your documents and data before hand to a suitable external drive.
2) If you are updating your system from a previous MacOS install and if, like many, you keep backups of your .dmg installer packages, it is wise to copy these to a new folder on the USB pen drive named “App installers”. This way, you have a fully accessible place to install them from when it comes time to do so. It also gives you an additional back-up of your app installers. This is only possible if using a USB Pen drive larger than 16GB. A 128GB USB pen drive is recommended for this very reason.
3) Ensure any and all required additional kexts are placed in the location noted in step 8 above before continuing.
4) Replace the Intelmausiethernet.kext in the the EFI>CLOVER>kexts>other folder of the "ThinkPad X220 macOS 10.13 Utility and Kext Pack" on your USB installer drive, with the one from RehabMan. This should solve problematic ethernet issues, however, it may not resolve the issue on all machines.
5) Add the contents of the “ATH9KFixup” zip to the EFI>CLOVER>kexts>other folder of the "ThinkPad X220 macOS 10.13 Utility and Kext Pack" on your USB installer drive
==================================
Step 2: Preparing your HDD, SSHD, SSD, mSata or other drive for installation of MacOS
BEFORE installing MacOS Mojave on your system, you will first need to ensure that your chosen drive for the install is clear of all partitions, data, and, particularly, any EFI partitions.
It is advised that you use “Diskpart” to clean the drive, Either via a windows machine, or via using a windows USB install drive (recommended method) by choosing the “Repair your Computer” option.
Using a windows USB install drive(recommended method):
(The following shows a Win7 USB installer being used for the purpose of using Diskpart to clean a drive ahead of OSX instalation)
Shut your system down, let it reboot, then go into the BIOS and check that USB FDD and USB HDD are set as the first boot devices ahead of your hard disk.
ALTERNATIVELY: Use the Function key relative to your system to call the Boot Device Menu, then choose the Windows USB installer drive to boot from it.
1) Boot from the Installer USB
2) Choose your language settings, then click next,
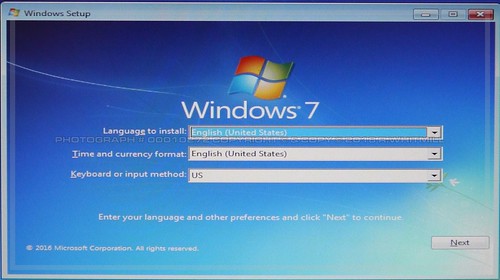
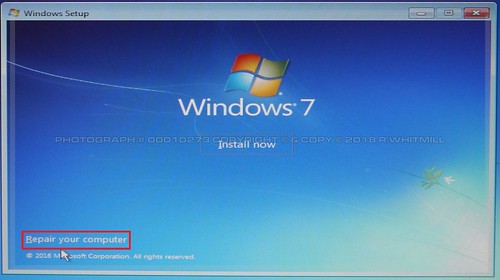
3) In place of clicking on “Install Now”, click the “Repair Your Computer” option in the bottom left of the window.
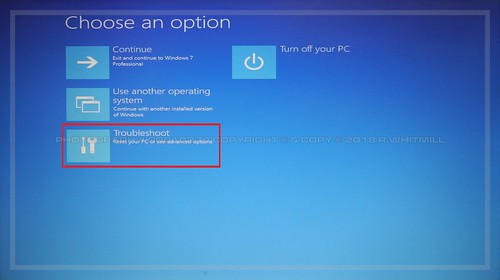
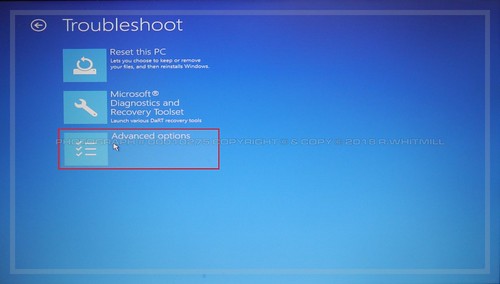
4) When the Repair option window appears, choose “Troubleshoot>Advanced Options>Command Prompt”.
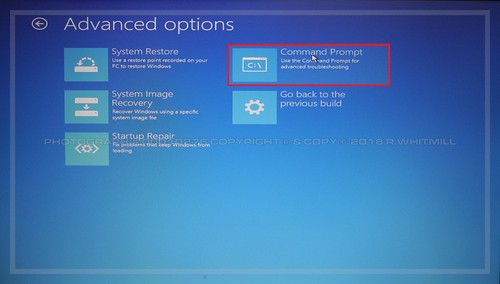
5) This will open up the Command Prompt window
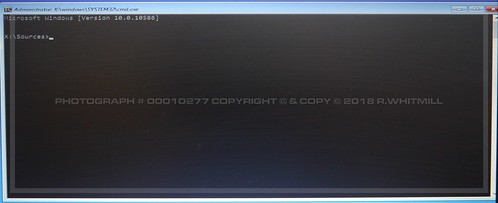
Here is where you enter the following Commands:
Note: All commands are entered without the " tags. (Only enter what is shown in bold italic)
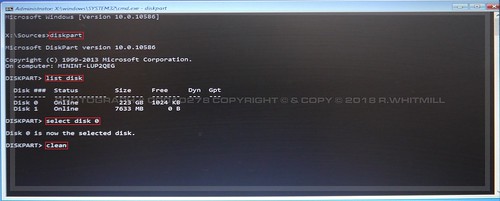
1) Type “diskpart” followed by hitting the Enter/Return key.
2) Type "List Disk" followed by hitting the Enter/Return key.
3) From the list of disks choose your intended install disk
4) Type “Select Disk X” followed by hitting the Enter/Return key. (Where disk X is you chosen install disk)
ENSURE YOU ARE CLEANING THE CORRECT DISK! As the writer of this guide I will NOT be held responsible for any erroneous loss of data caused by your use of these commands.
5) With the CORRECT disk selected, type "Clean" followed by hitting the Enter/Return key.
This is how it should look in the command prompt window, up to the point of typing "Clean"
This ensures a clean drive free from any and all data and partitions, inclusive of removing any EFI partition/s that may be present.
From within Windows:
You will need to ensure that “Volume Shadow Copy” and Virtual Disk” services are running otherwise this may not work.
1) Click on Start
2) Type “diskpart”
3) Right click on “diskpart.exe” and select “run as administrator”, This will then open the command prompt window, where you will use the commands noted below.
Note: All commands are entered without the " tags.
4) Type "List Disk" followed by hitting the Enter/Return key.
5) From the list of disks choose your intended install disk
6) Type “Select Disk X” followed by hitting the Enter/Return key. (Where disk X is you chosen install disk)
ENSURE YOU ARE CLEANING THE CORRECT DISK! As the writer of this guide I will NOT be held responsible for any erroneous loss of data caused by your use of these commands.
5) With the CORRECT disk selected, type "Clean" followed by hitting the Enter/Return key.
This is how it should look in the command prompt window, up to the point of typing "Clean"
IMPORTANT NOTE: IF you intend to dual boot MacOS and Windows or any other O/S on two (or more) separate HDD's and one HDD (or more) already has an O/S install or important data on it, you will need to REMOVE or DISCONNECT that/those HDD’s before installing MacOS otherwise you could break that/those installation/s or potentially “accidentally” erase a drive containing important/valuable information.
Removing/disconnecting the other HDD/HDDs also means you will not "accidentally" erase it/them during the "Clean" process or the install process for MacOS.
Do NOT say you have not been warned, because you have been!.
================
Step 3: Preparing to install MacOS Mojave
GOLDEN RULE OF ANY O/S INSTALL ON A LAPTOP: Plug your systems power supply in and connect it to the laptop!
In otherwords, make sure the Power supply is connected and powering the laptop before proceeding with an O/S install. NEVER rely solely on battery-power during an O/S install
DOH! Head Slap!!
There are a couple of BIOS settings to deal with before starting the install. These should have been checked/changed already but just in case anyone skipped ahead, or missed this step previously, they are as follows.
1) Restart your machine, and immediately hit “F1” (or the key required) To enter your BIOS screen
2) Go to Config and ensure “power on with AC attach” is DISABLED
3) Whilst in config, Set “Serial ATA” to “AHCI” mode
4) Go to “Security” and check that Memory Protection>Execution Prevention is ENABLED
5) Go to "Startup" and ensure that UEFI/Legacy option is set to “Both”
6) (Optional Step) Whilst in startup, check the “Boot Sequence” and set your chosen install medium as the first boot device (USB FDD or USB HDD usually).
7) Hit F10 (or the correct key to your system) to save settings and reboot.
================
Step 4: Installing MacOS Mojave.
1) Ensure your machine is shut down, then Insert your “install MacOS Mojave” USB drive in to a free USB 2.0 or, if available, USB 3.0 port.
2) Start your machine.
Within a few moments, you should be faced with a screen that shows an “Install MacOS Mojave” icon.
Clicking on this with the mouse, or simply hitting enter/return will make the choice and the installer should start loading.
On a side note, during this process on both the X220 and the T420, the installer required a secondary attempt to load. The symptom of this is a partial load and auto reboot. Do not worry if this happens to you, it will NOT affect anything.
Simply let the machine reboot and click on the “Install MacOS Mojave” icon or hit enter/return again to continue.
With the Installer loaded, the first task is to format the drive that you cleaned previously.
Here is how to format the drive, ready for installing MacOS
From the MacOS install screen, look to the lower left and you will see a “Utilities” window. This window can be moved, or scrolled, But you will see the “Disk Utility” Third in the list from the top.
1) Select the “Disk Utility”

2) click the View menu at the top of the window
Then select Show All Devices
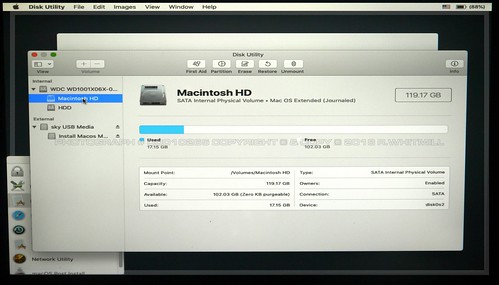
3) Select your target disk (select the physical disk, not a volume on the disk) and, from the menu at the top of the Disk utility windows, click on “Erase” (middle button of the five).
In the following images, a WD Black2 Dual drive is being used. Whilst it appears to show two “Volumes” they are, in fact, separate drives on a 2-in-1 drive (SSD & HDD combi).
(If the target disk is already in APFS format, or if multiple partitions exist, it may be necessary to click “Partition” and remove these partitions)
After clicking on "Erase", a new window will appear
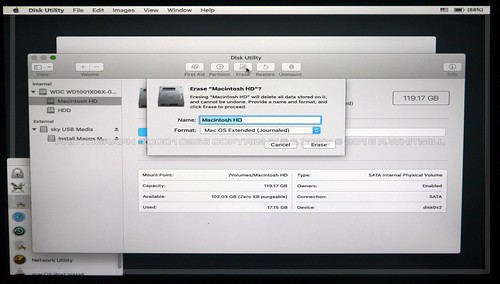
On this new window, Name the target disk "Mojave" (It shows Macintosh HD in the image/s below)
For format select APFS
For scheme select "GUID Partition Map"
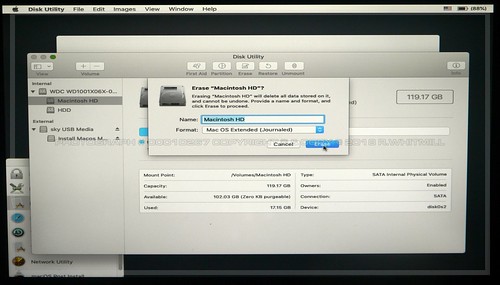
Click on "Erase"...The following window will open, showing the progress whilst the disk is erased..
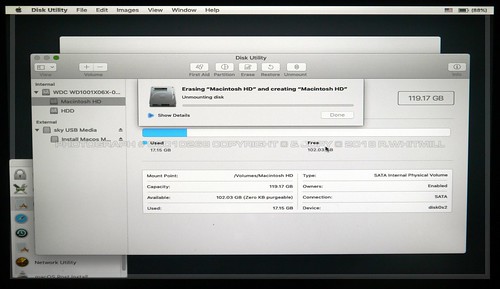
Click on the triangle arrow next to "Show Details" to see the full (Verbose) progress/results of the process.
You must end up with a single partition on the target disk, so check that is the case before continuing
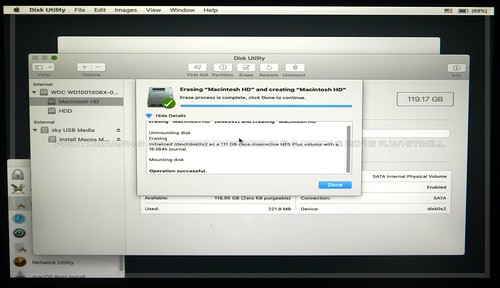
4) When the "Erase" process has completed, click on "Done" on the Erase window, then exit the "Disk Utility" to return to the install window
================
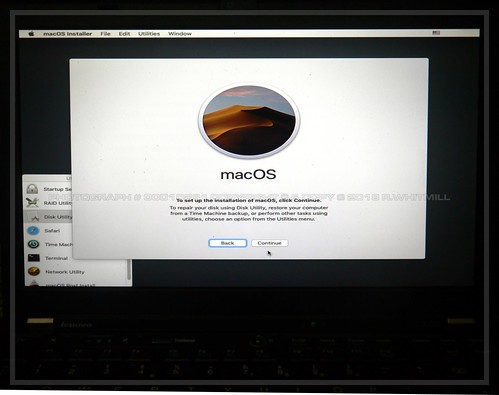
Now to install Mojave
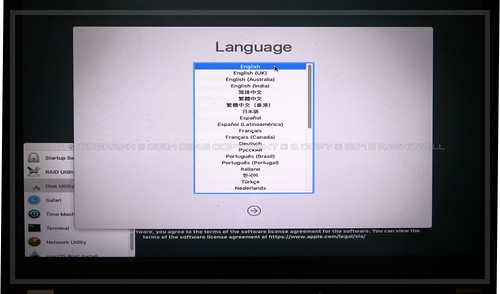
1) On the install window,you will see two buttons, one that is entitled "Back", The other entitled "Continue". If you do NOT need to change your Language, click "Continue"
if you DO need to change your language, click "Back", select your chosen language, then click on the right pointing arrow to return to the Install window and continue.
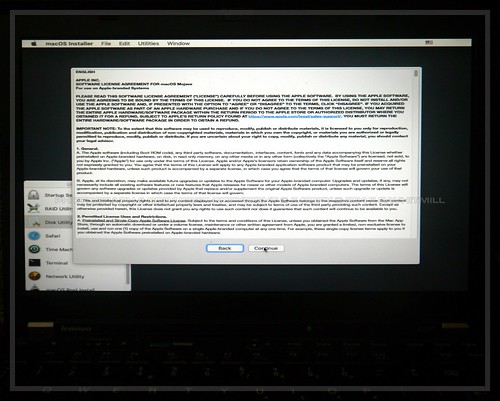
2) On the next window (EULA Agreement), Click “Continue"
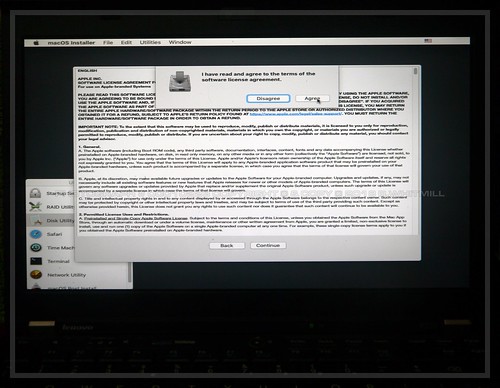
3) Click “Agree” on the drop down box
4) On the next window, click on the “Macintosh HD” icon to choose your formatted HDD/SSD as the install location.
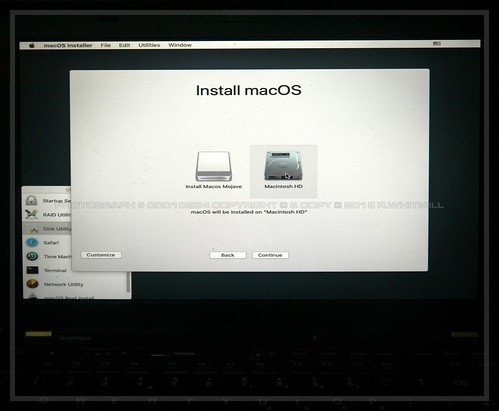
5) Now click on “Continue”
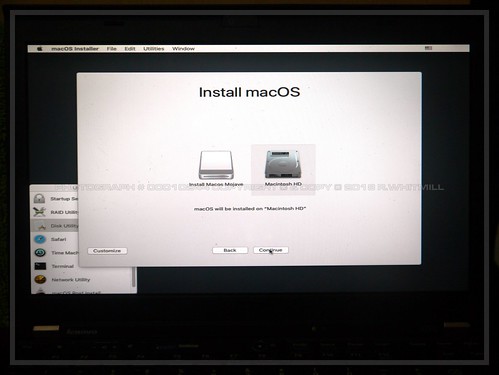
6) The next window will state Installing on “Macintosh HD” and, under the progress bar, it will state “About xx minutes remaining” (Where xx is the minutes shown and can vary between machines).

Allow the install to run and the machine to reboot, then boot from the USB installer again. It will resume at the "Install" window and here is where things are different from a High-Sierra install.
================
Stage 2 of the Install
Following the reboot and loading from the USB installer, you should be presented with what appears to be (and in actual fact is), the install window you started from earlier.
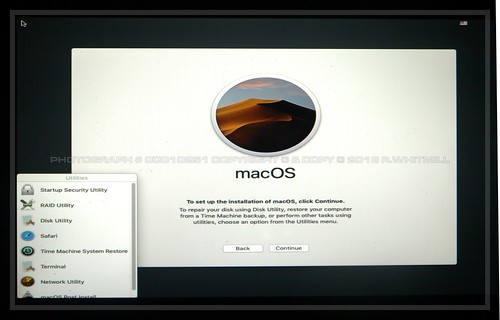
Again, look to the lower left of the screen to the "utilities" window. THIS is where we start to complete this stage of the install.
1) Locate the utilities window.
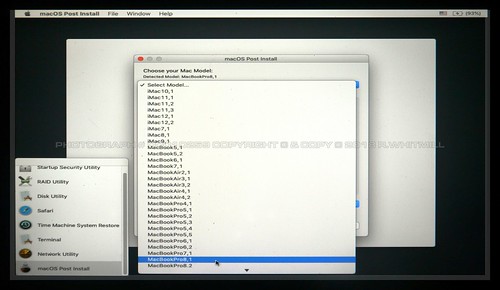
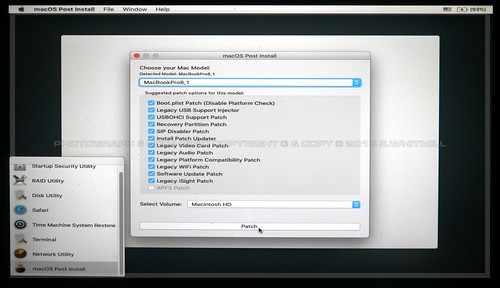
2) Select the "MacOS Post Install" menu option and click on it.
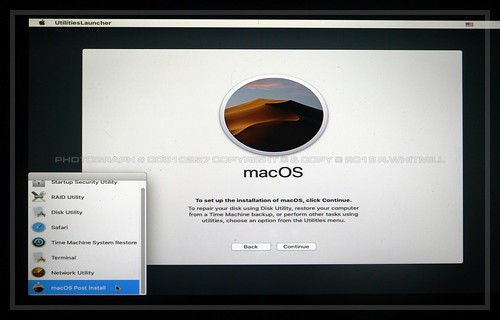
3) You will be faced with a new window.....
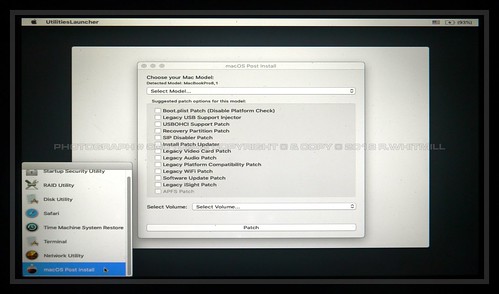
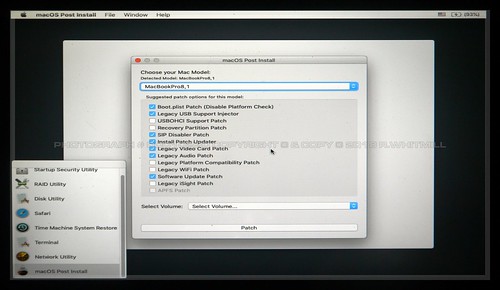
4) From the top most drop-down menu, select the "MacBookPro 8,1" option
5) After making this selection, you will be presented with the following window
6) Next, click on the "Select Volume" dropdown menu......
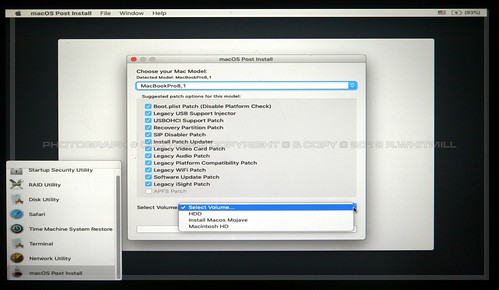
7) Choose "Macintosh HD"
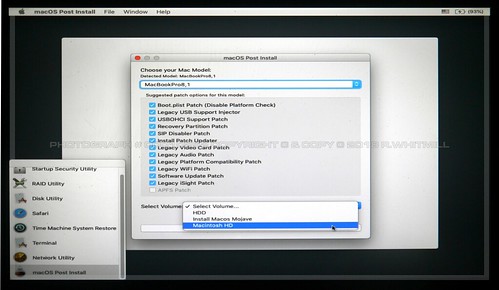
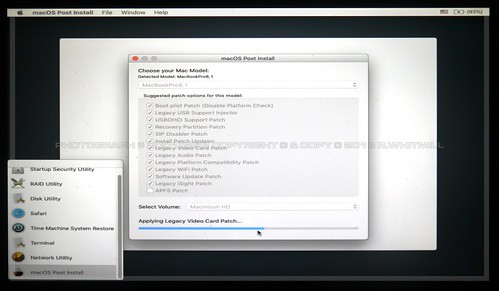
8 ) Click on "Patch" to continue
9) The Patch installer will get to work...
10) When the patch installer completes, select the checkbox next to "Force Cache Rebuild"
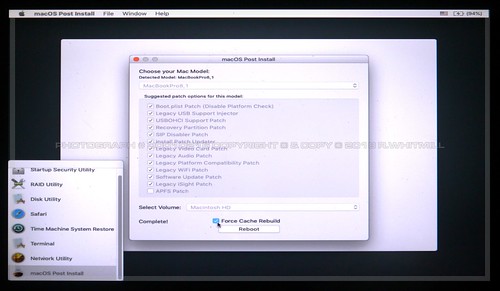
11) Click "Reboot"
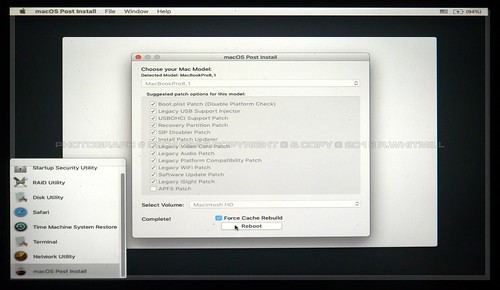
12) Forced cache rebuild starts....
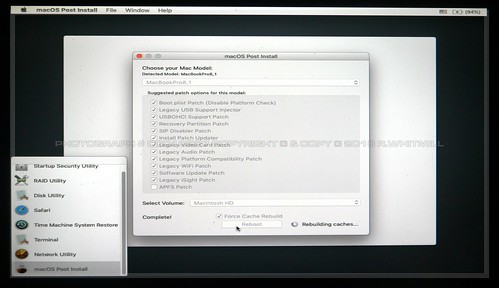
13) Your system will automatically reboot.
14) Choose to boot from the HDD and NOT the install USB this time
15) Welcome to MacOS 10.14 Mojave!
Hold on though, there is a little more to do yet before you are finished!
================
Post Install Jobs to complete...
When your system boots into what is, essentially, an all-but-completed installation of Mojave, you will have to navigate through a small number of "final setup" windows.
These are as follows:
NOTE: The "WiFi" connection section was skipped to protect personal and local WiFi connections
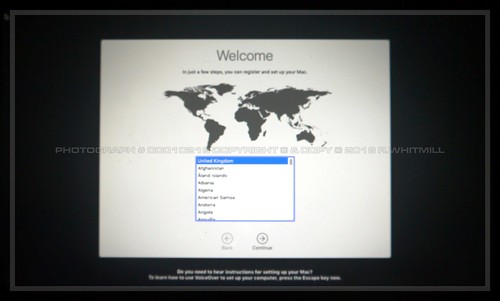
1) Locale
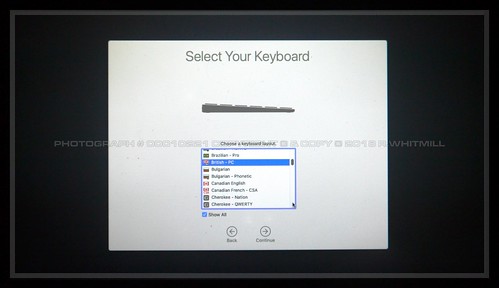
2) Locale for Keyboard settings

Pro Tip: Click on "Show All" for more options.
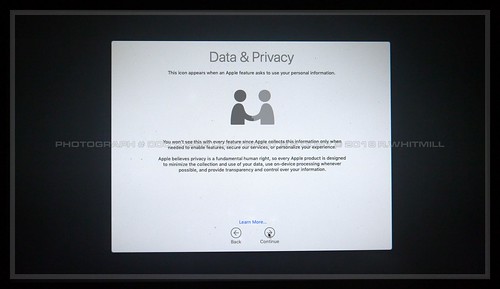
3) Data & Privacy notification
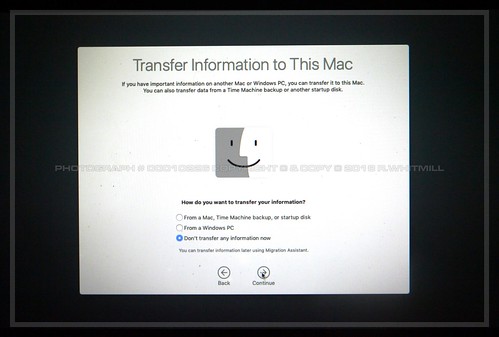
4) "Transfer Information To This Mac" Window
5) "Sign In With Your Apple ID" Window
If you wish to sign in, do so. (Recommended)
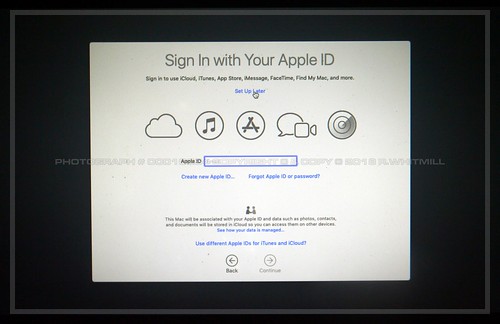
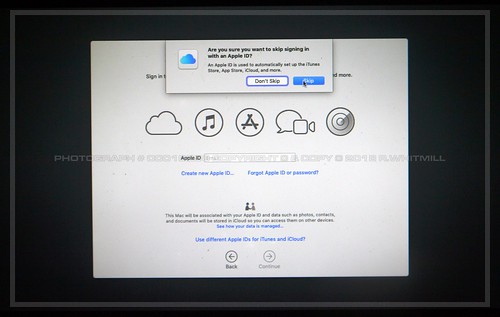
Otherwise, skip this step by clicking on "Set Up Later"…….
Then click on "Skip" from the drop down message
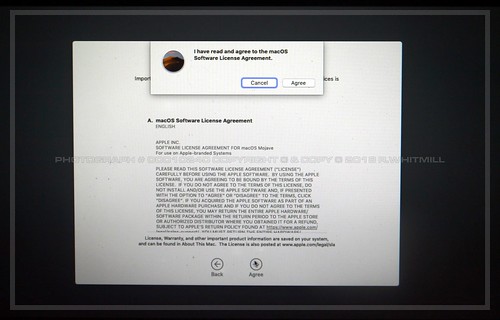
6) "Terms and Conditions" window.. Click on the "Agree" roundel
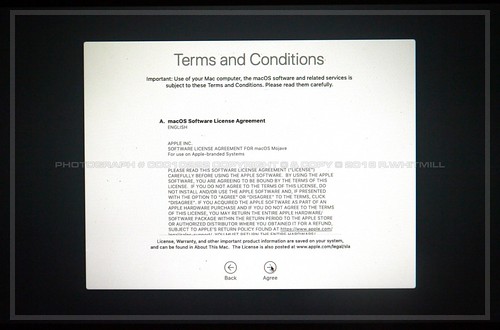
This will call a dropdown window, on which you will need to click "Agree" again.
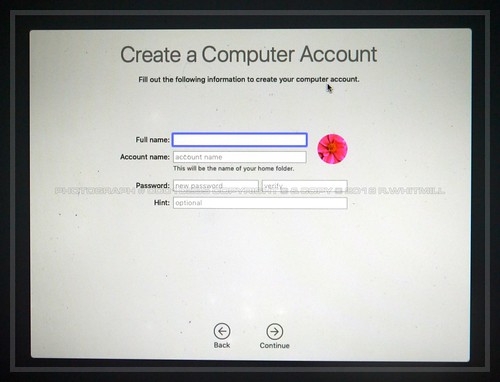
7) "Create A Computer Account". Self-Explanatory really, but….
This is where you create your user account. Fill out the information, change the icon if you wish to, then click on "continue".
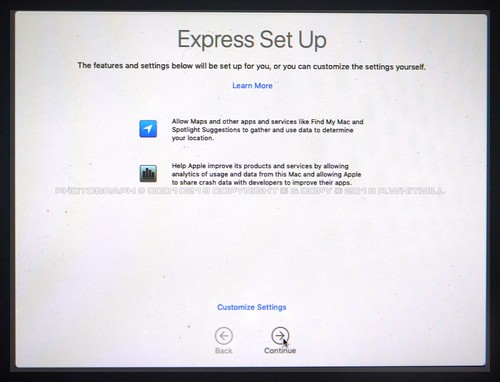
8 ) "Express Setup". Always select "Customise Settings"
Selecting "Customise Settings" opens up, firstly, the "Location Settings" window. Always deselect "Enable location services on this Mac" if you want a bit of privacy.
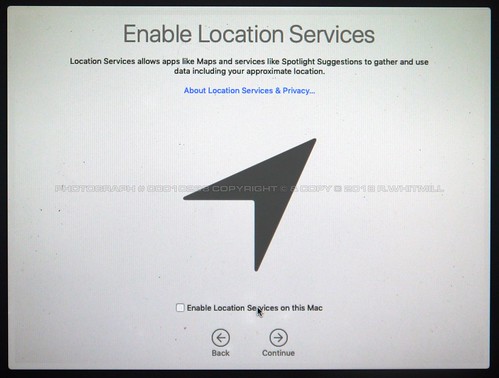
Clicking on "Continue" brings up a secondary window.
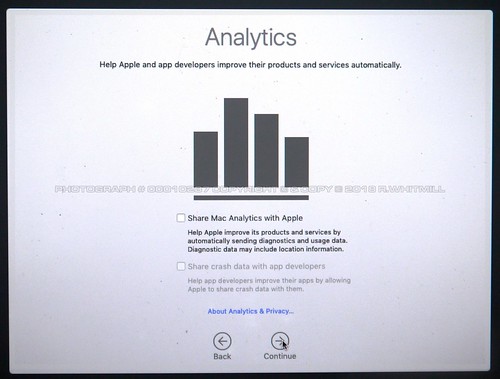
The next window is "Analytics"..
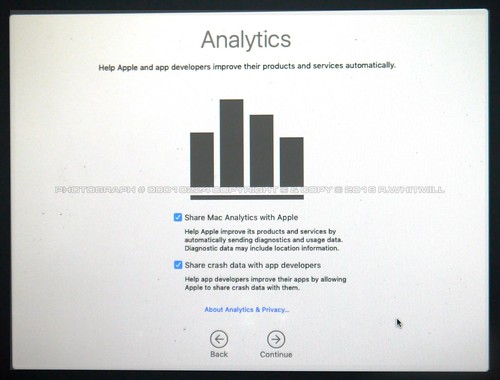
Again, here deselect everything before selecting continue, if you do not want the machine to “Call Home”
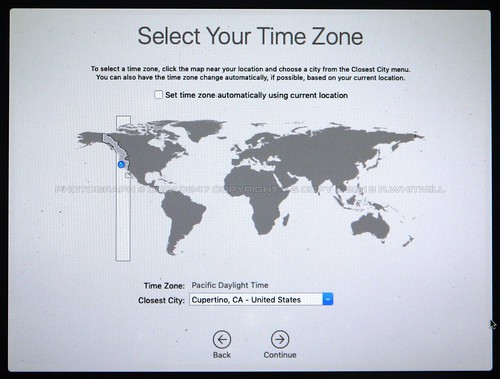
9) "Select Your Time Zone". Self explanatory really...
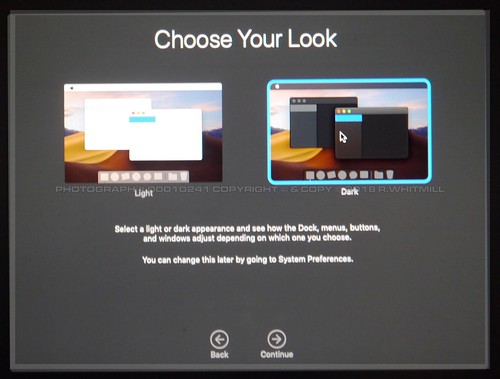
10) "Choose Your Look".
Here, ALWAYS select the "Dark" theme. Reports across the web suggest that the "light" theme does not play nicely with elder machines and so, to avoid potential problems, we use the Dark theme.
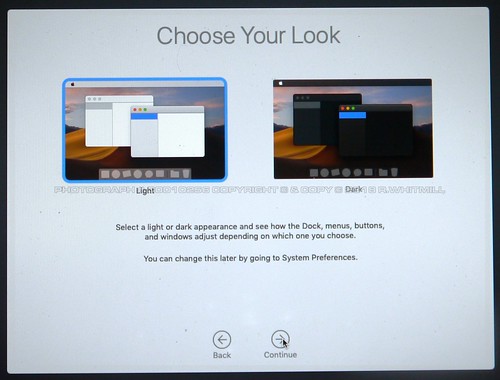
There, That's better
With all that done, we get to the desktop of Mojave. Hang on though, as we have a few more steps to complete.
On first entering the O/S and reaching the desktop, you will be faced with the following...
This is the "Patch Updater" for the "MacOS Mojave Patcher". It is currently sitting over the keyboard setting window, which should not be accessed until we finish the "update". NOE: If you do not have an internet connection WiFi or Ethernet, this window will /nt show until such time as you DO have an active internet connection)
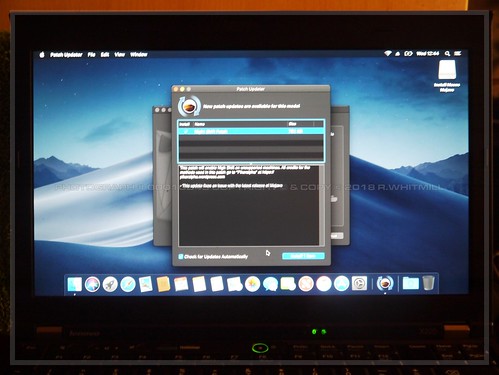
All that is needed here is to click on the "Install 1 item" button and wait for it to complete......
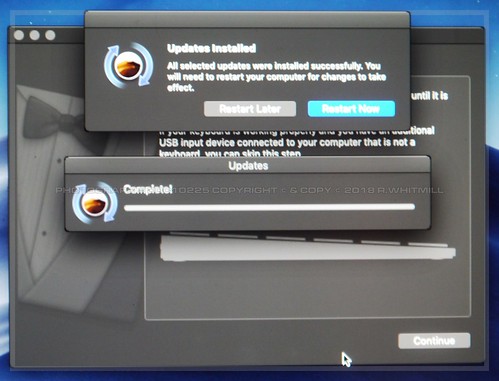
Then click on "Restart Later".
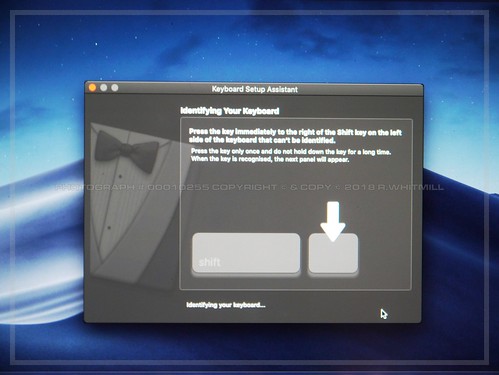
Now that we have access to the keyboard setting window....
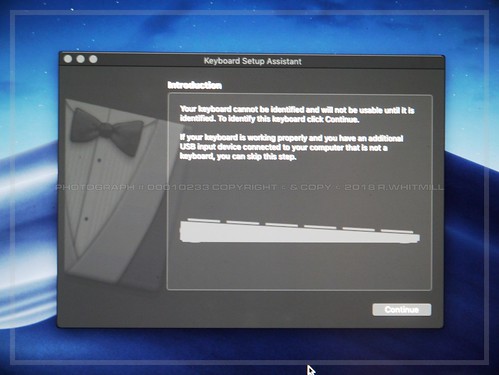
We simply click on "Continue" and move to the next screen and follow the instruction...
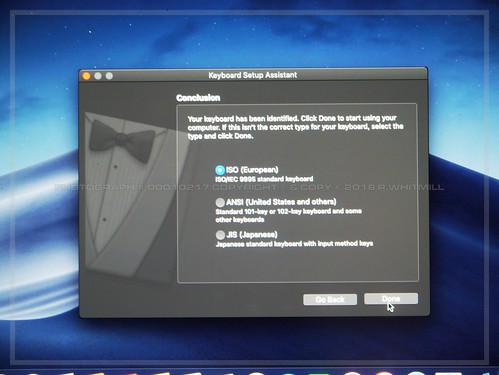
This then takes us to this window, where we simply click on "Done" to finish this section of the installation.
================
During the Following steps, you will need to reboot your machine a total of five times. These reboots form an integral part of the step they are called from and should be completed when instructed to do so.
BEFORE ANYTHING ELSE, CARRY OUT THE FOLLOWING TASK
This is ABSOLUTELY IMPERATIVE, as it it allows the use of applications from Unidentified Developers.
1) Launch a Terminal window (Launchpad>Applications>Utilities>Terminal)
2) Copy and paste the following into the terminal window
Code: Select all
sudo spctl --master-disable4) Enter your password, hit the enter/return key.
5) When the command completes, quit the Terminal window (right click the icon in the dock, then choose "Quit")
Now that is done, lets carry on...
1) Copy "Clover Configurator" from the "ThinkPad X220 macOS 10.13 Utility and Kext Pack" to "[NameofHDD]>Applications"
2) Copy the "Kext Utility" from the USB installer drive (from the main section of the USB drive, under EFI>CLOVER) to "[NameofHDD]>Applications"
3) Click on "Finder" from the task menu at the top of the screen, and choose ""Preferences" (Command+,).
4) When this menu opens on "Folder Options" select to show "Hard Disks" and, if you have any "Connected servers"
Open "Clover Configurator" from Launchpad, then, from the left hand menu, choose the ""Mount EFI" option.
5) Double-click the "Mount Partition" icon to the right of your HDD "EFI" folder. It should be showing as "EFI on EFI (disk*s1)" (Where * is the number of your disk). If the account security pop-up appears, simply enter your password and click on "ok" to continue.
6) Double-click the "Mount Partition" icon to the right of your USB "EFI" folder. It should be showing as "EFI on EFI (disk*s1)" (Where * is the number of your disk) If the account security pop-up appears, simply enter your password and click on "ok" to continue. (This provides proof that we can mount the EFI partition of a USB connected device should we ever need to)
The EFI partition for the HDD as well as the USB installer drive should be showing on the right hand side of your desktop.
8 ) Quit "Clover Configurator" completely (right click the icon in the dock, then choose "Quit")
9) Open the "X220 macOS 10.13 Utility and Kext Pack" folder and copy the ENTIRE "EFI" folder (right click>"Copy")
10) Open the "EFI" partition of the HDD, then paste the "EFI" folder (right click>"Paste") from the "X220 macOS 10.13 Utility and Kext Pack" folder of your USB install drive
11) Return to the "X220 macOS 10.13 Utility and Kext Pack" folder and go to "EFI>Clover>Kexts". Launch the "_kext_install_command" script
12) Enter your password when asked, hit the enter/return key, then allow the script to complete. You will see a "Process completed" message when it has finished.
13) You will now need to reboot your machine before continuing.
14) Quit the terminal window (right click the icon in the dock, then choose "Quit")
Allow the machine to reboot then continue with finalising the install.
================
Following the reboot, these are the next steps.
Additional steps that should improve battery life with optimized CPU power management:
1) Confirm that you have an active connection to the Internet before continuing
A) Open a Terminal window then copy and paste the following command and hit Enter:
Code: Select all
curl -o ~/ssdtPRGen.sh https://raw.githubusercontent.com/Piker-Alpha/ssdtPRGen.sh/master/ssdtPRGen.shCode: Select all
chmod +x ~/ssdtPRGen.shCode: Select all
./ssdtPRGen.shResults of the above actions:
1) A customized SSDT.aml for your specific machine will now be in the directory /Users/yourusername/Library/ssdtPRGen
2) Open Clover Configurator and Mount the "EFI" partition of your HDD
3) When entering the /Users/[yourusername]/ directory, you will need to click on the gear icon at the top of the window, open "Select View Options" and then ensure that "show library" is selcted.
4) You now need to copy the "SSDT.aml" file from "[nameofHDD]/Users/yourusername/Library/ssdtPRGen" to "/Volumes/EFI/EFI/CLOVER/ACPI/patched/"
With the above carried out, restart the machine.
================
More to do, but the list is becoming shorter...
1) Enable TRIM by entering the following command in a terminal window, followed by the enter/return key
WARNING: this step will cause an auto-reboot on completion. Ensure all other work is saved before commencing this step.
Code: Select all
sudo trimforce enablei) Are you sure you wish to proceed (y/N)?
ii) Your System will immediately reboot when this is complete.
Is this OK (y/N)?
After answering Y to both questions, the following message will appear as it works through the command:
Enabling TRIM...
.
.
Operation Succeeded. Your system will reboot momentarily, please wait...
Allow the machine to auto-reboot, then continue from step 3, Below
================
2) If screen brightness controls are not working
remove "AppleBacklightInjector.kext" from "[nameofHDD]/Library/Extensions", run the Kext Utility and then restart the computer.
If you continue to encounter problems with brightness control, you may have to try and create your own version of AppleBacklightInjector.kext tailored to meet you own hardware configuration. A script is available from RehabMan here.
================
If you have installed a FHD (1920×1080) panel it may be necessary to remove the "Replace 4th port with VGA" patch in the Clover config.plist and take additional steps to inject a custom EDID. The discussion here includes additional details.
================
3) Enable Additional Scaled Resolutions in macOS by carrying out the following steps
A) Open the Terminal and enter the following command, followed by hitting the enter/return key:
(This is usin 1366x768 T420 LCD as the example)
Code: Select all
ioreg -lw0 | grep IODisplayPrefsKeyCode: Select all
"IODisplayPrefsKey" = "IOService:/AppleACPIPlatformExpert/PCI0@0/AppleACPIPCI/IGPU@2/
AppleIntelFramebuffer@0/display0/AppleBacklightDisplay-30e4-40a0"Change those numbers in the next two steps to match your output from step 2.
C) Create an Override folder named DisplayVendorID-[yourvendorID] by entering the following command in the Terminal window:
Code: Select all
sudo mkdir /System/Library/Displays/Contents/Resources/Overrides/DisplayVendorID-[yourvendorID]Copy this basic code.
Code: Select all
sudo nano /System/Library/Displays/Contents/Resources/Overrides/DisplayVendorID-[yourvendorID]/DisplayProductID-[yourproductID]Copy your edited code, then paste into the terminal window, followed by enter/return key.
Use the hexadecimal to decimal converter tool here to get the decimal values that correspond to your DisplayVendorID and DisplayProductID
For example:
the hex value 30e4 converts to the decimal value 12516 (X220 & T420)
the hex value d302 converts to the decimal value 54018
the hex value 2d8 converts to the decimal value 728 (X220)
the hex value 40a0 converts to the decimal value 16544 (T420)
E) Copy this code:
(This uses the T420 1366x768 LCD as the example again)
Code: Select all
<?xml version="1.0" encoding="UTF-8"?>
    <!DOCTYPE plist PUBLIC "-//Apple//DTD PLIST 1.0//EN" "http://www.apple.com/DTDs/PropertyList-1.0.dtd">
    <plist version="1.0">
    <dict>
            <key>DisplayProductName</key>
            <string>Lenovo T420 Display</string>
            <key>DisplayVendorID</key>
            <integer>12516</integer>
            <key>DisplayProductID</key>
            <integer>16544</integer>
            <key>scale-resolutions</key>
            <array>
                    <data>AAAGAAAAA2A=</data>
                    <data>AAAHgAAABDg=</data>
            </array>
    </dict>
</plist>Once edited, copy the edited code, and paste it into the new file you just created by using “command+V” or right click “Paste”
F) Press <Ctrl> + <X> and then respond with Y (for Yes), then press <Enter> to save the file and exit nano
G) Restart the computer
NOTE: After restarting your machine, the scaled resolutions of 1536 x 864 and 1920 x 1080 should now show up in System Preferences > Displays
================
4) To enable Night Shift
A) Open a Terminal window and enter the following command to install Xcode Command Line Tools:
Code: Select all
xcode-select --install

cd /tmp; curl -s -o NightPatch.zip https://codeload.github.com/pookjw/NightPatch/zip/master; unzip -o -qq NightPatch.zip; cd NightPatch-master; chmod +x NightPatch.sh; ./NightPatch.sh================
5) To re-enable "Font smoothing" enter the following code in a terminal window, followed by the enter/return key
Code: Select all
defaults write -g CGFontRenderingFontSmoothingDisabled -bool NOIf font smoothing is not active or you wish to double check the setting of it, simply go to System Preferences>General look to the bottom of the window and you should see "Enable font smoothing". If it it not selected, select it. If it is selected, de-select it, then re-select it. You should see the diffence if font smoothing is active.
================
6) Default sleep settings may cause a 20-25 second delay in sleeping and waking. To reduce this delay the hibernatemode setting can be changed to mode 0
Open up a Terminal Window and enter the following command, followed by the enter/return key
Code: Select all
sudo pmset -a hibernatemode 0==================================
CONGRATULATIONS!! YOU HAVE INSTALLED MacOS 10.14 Mojave. NOW GO AND ENJOY IT!
FOR ANY POTENTIAL/KNOWN ISSUES, PLEASE CHECK WITH THE MacOS COMMUNITY OR FORUMS THAT HAVE KNOWLEDGE SURROUNDING Mojave IN PARTICULAR.
==================================
Recommended Reading / Video's
It is worth reading the "Notes and Suggestions" section of http://x220.mcdonnelltech.com for further useful information.
This video by Youtube User N1T3M4N1969 >> https://youtu.be/cpLiH-0SsDA
==================================
Recommended Apps
1) Libre Office. A great little utility app that contains equivelant tools to MS Office word, excel etc.
Link to Website: https://www.libreoffice.org/
2) Firefox- A great browser, with great add-ons to suit almost everybody.
Link To Website https://www.mozilla.org/en-GB/firefox/
Yes, older versions CAN be downloaded. Simply search for the version number followed by the word "Mac"
For Example, search for "Firefox 54.01 download Mac" and a link will be listed for that version.
3) Slimjet web browser. A fork of Chrome, but without the weight or heavy resource requirements. a great alternative to firefox too!
Link to Website https://www.slimjet.com/
4) Elmedia Video Player. Available in "free" and "Pro" flavours.
A great alternative to GOM player and Quicktime Player alike, it also includes a number of codecs to boot.
Link to Website https://mac.eltima.com/media-player.html
5) VLC Medi Player. free and open source cross-platform multimedia player.
An alternative player to Elmedia, that plays what Gom won't and Elmedia can not due to codec issues.
Link to Website https://www.videolan.org/vlc/download-macosx.en-GB.html
Direct Download https://get.videolan.org/vlc/3.0.4/macosx/vlc-3.0.4.dmg
==================================
Tips/Tricks
1) Using the following key combination allows you to use the "Screen Recroder/Snapshot" tool:
Shift+Command+5 (Left Shift key+ALT key+5 key, on a windows based keyboard)
2 IF you wish to hide the extra options/boot options shown in the bootloader, you will need to edit the "config.plist" in the EFI>CLOVER folder of you EFI partition.
Below, I have shown an example of the "hide" options I have previously used when running Windows as well as OSX on the same machine.
Code: Select all
<key>GUI</key>
	<dict>
		<key>#TextOnly</key>
		<false/>
		<key>EmbeddedThemeType</key>
		<string>Dark</string>
		<key>Hide</key>
		<array>
			<string>BOOTX64.EFI</string>
			<string>Data</string>
			<string>legacy</string>
			<string>Preboot</string>
			<string>Recovery</string>
			<string>Reserved</string>
			<string>Restore</string>
			<string>W7</string>
			<string>Windows</string>
			<string>Windows from EFI</string>
			<string>EFI from EFI</string>
		</array>
==================================
Credits
N1T3M4N1969
Discovering, deciphering and proving an install process,
discovering steps that shorten install time
6r1ft3r6uru & N1T3M4N1969
Finalising overall install process and additional steps to make install easier
6r1ft3r6uru
Compilation and writing of the guide, Photo's and Video/s, additional steps streamlining install process.
==================================
Sources & Resources
John Mcdonnell
http://X220.mcdonnelltech.com
For various steps and information included within this guide
For the Utility & Kext Pack
DOSDude
http://dosdude1.com/mojave/
For the “patch macOS Mojave” patch
RehabMan
For the "IntelMausiEthernet-v2-2018-0424"
Angristans Blog
https://angristan.xyz/how-to-fix-font-r ... 14-mojave/
For the "Font Smoothing" code
Black-Dragon
For the “Atheros AR92xx kext pack”
Direct Download: https://github.com/black-dragon74/ATH9K ... ELEASE.zip
==================================
b]21/Oct/2018[/b]
Rev.1.0.4
Changes:
1) Tidying of language,
2) Further clarification of actions within steps through re-writing/re-wording,
3) Addition of some steps,
4) Addition of “Using Diskpart to clean your HDD”, explanation and associated images.
5) Changes/additions/removals to/from "Recommended Apps" list.
=====================================
Whilst "Vanilla" (Id-Est "unpatched") installs of Majove AND High Sierra have been performed and verified across M73, T420, X220 and iTX intel based tower systems and as such omitting a number of major steps within this guide, I will NOT, for the time being, be posting a new guide due to the fact that a Hybrid EFI configuration was used. If in the future I can distribute the EFI, then a guide may be forthcoming. Until then, however, I have no choice but to support this guide alone.
Whilst an install of Mojave (as well as High Sierra) has been successful on an M73, I will NOT be publishing a guide on how to install on that platform due to utilising a different install process that leads to a "Vanilla" install using a hybrid EFI configuration and needing time to test the install for stability.
=====================================
As a wise person once said:
"You never have done things by half-measures. Lord help everyone, they do not know what they are in for"..................
WHILST I WILL CONTINUE AS LONG AS POSSIBLE TO UPDATE THE RELEVANT LINKS FOR THE RELEVANT TOOLS, I MAY NOT ALWAYS RESPOND TO QUESTIONS AND/OR QUERIES.
PLEASE, IF YOU HAVE A PROBLEM, AT LEAST STATE WHICH MACHINE YOU ARE ATTEMPTING TO INSTALL ON. IT MAKES THINGS SO MUCH EASIER.
