


As the keys are small, and all the parts (switch, pins, hooks) are thin plastic, removing the keycaps (typically for cleaning stuck debris) must be done with care. A reasonable amount of force needs to be applied to separate the cap from the switch, but it should be applied at the correct place and in the correct direction to avoid breaking anything. There is typically one correct direction, from which the keycap should be pried, carefully, using something approximately as wide as the key itself, like a fingernail, or a large flat screwdriver tip. This ensures that the hooks are separated from both corners, and no excessive force is applied to a single corner, which would cause something to twist and snap. Personally, I prefer to never use any tools but my fingernails, as it gives me more precise control.
So, applying any kind of diagonal force is out, but it's not enough: there is usually a single correct direction from which the keycap separates from the mechanism and comes off easily, whereas from another direction it requires more force, which leads to one of two outcomes: the switch mechanism comes off with the key (sometimes requiring delicate reassembly) or, even worse, something will snap (typically one or two of the pins holding the two switch parts together). The fact that the switch mechanisms differ slightly from keyboard to keyboard, and even between different keyboard manufacturers within the same laptop line, make it a delicate process, sometimes involving careful trial and error.
Unfortunately, when I needed to clean some crap stuck inside my Thinkpad 25 keyboard a couple of weeks ago, I made a mistake and tried to pry the cap of from the wrong direction; when it came off, I didn't realize at first that I broke the pins, although in hindsight it should have been obvious. Before I knew better, I broke a second key in the same manner.
Fortunately, I got a spare keyboard, and since there is a single manufacturer of keyboards for the TP25, the mechanism is the same, and I was able to simply transplant it without taking the laptop itself apart. In the process I learned a good deal about the scissor switches on this particular keyboard, and decided to document it with pictures and share, as it might prevent other owners from making the same blunders. Also, since many laptop keyboards are built around the same principles, this know-how can be partly applied to other systems as well.
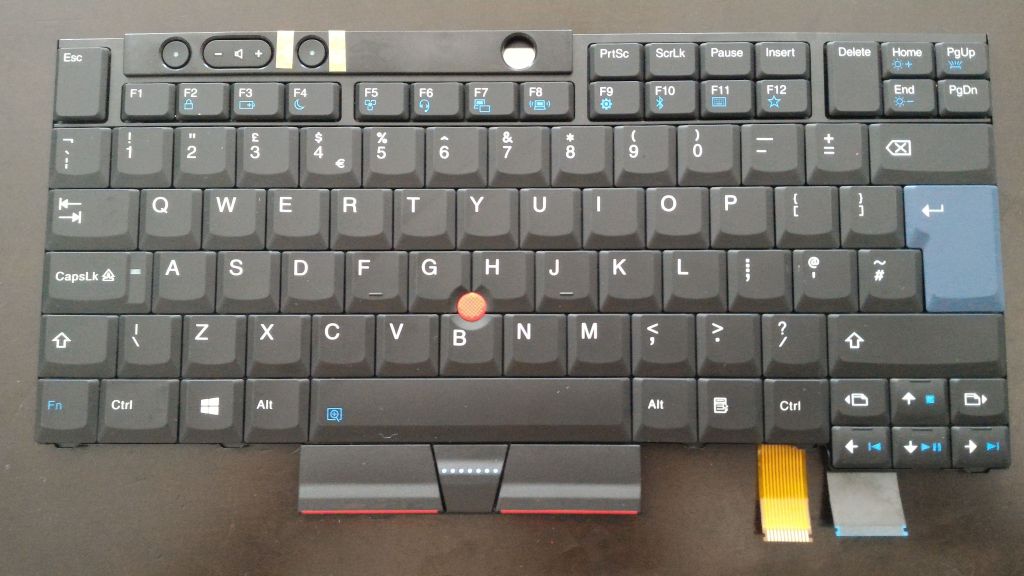
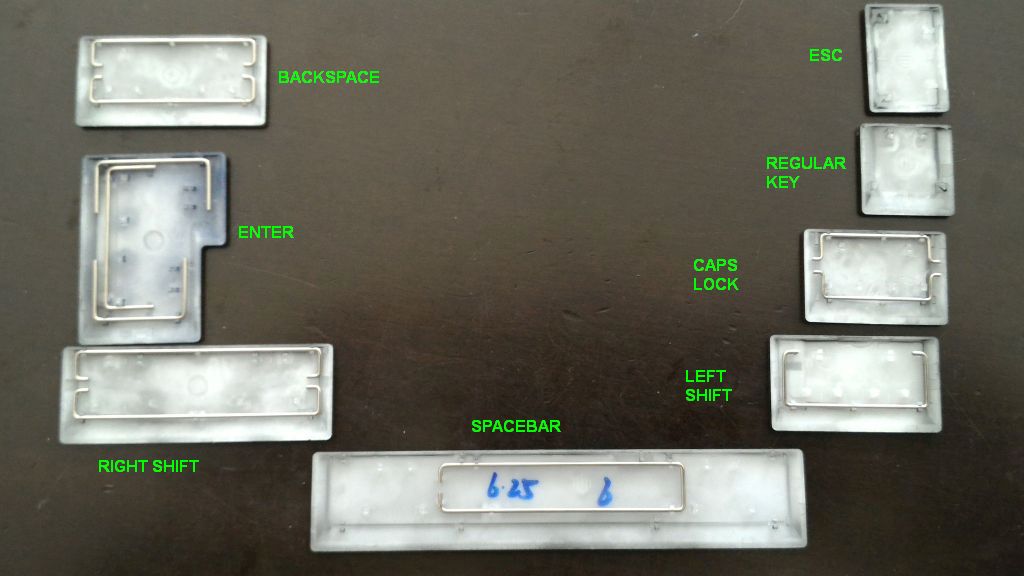
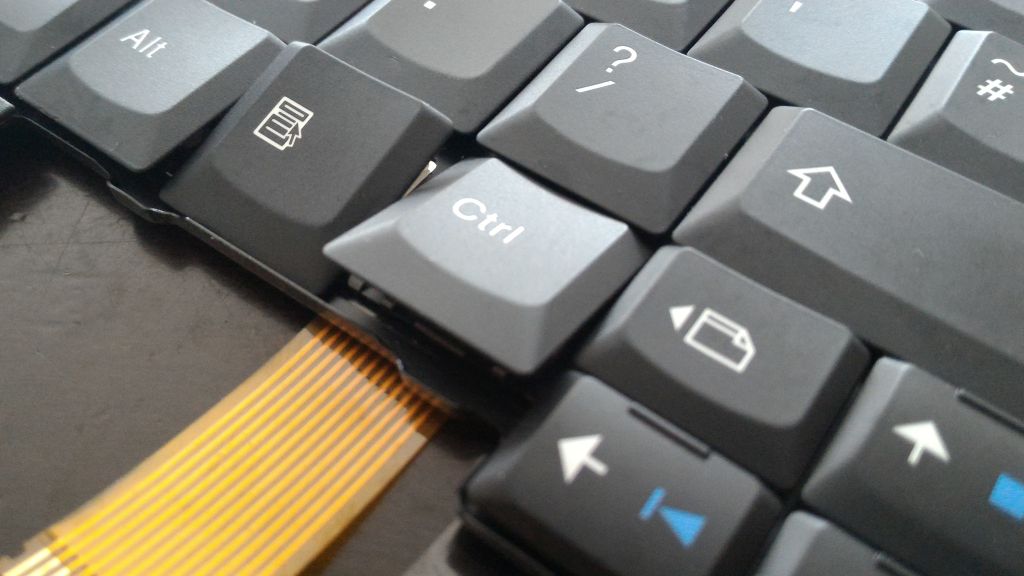
My TP25 has the US layout, but the spare keyboard is the UK layout; here it is:
Since not all keys are the same size, the underlying mechanisms are also different. I counted 10 distinct types: regular key (square), small key (functions / arrows), vertically enlarged key (Esc/Delete), several types of horizontally enlarged keys (Tab/CapsLock/Shifts/Backspace) and the Spacebar. On the UK (ISO) keyboard, the Left Shift and Left Ctrl are the same, and the Enter is a very special L-shaped key, enlarged both horizontally and vertically. On a US (ANSI) layout, the Left Shift is slightly longer than the Backspace and the Enter is the same as Left Shift:
 --------------------------
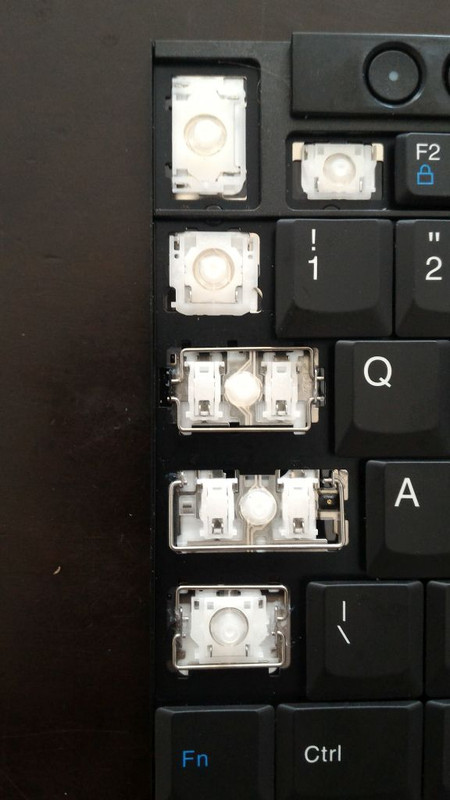
- Most keys (standard and small) have a single top-bottom scissor switch
- Esc and Del have a larger and 90-degree rotated left-right scissor switch
- The switches are held to the backplate via 4 small hooks - 2 hooks for each part
- Most of the larger keys have, in addition to these hooks, pairs of metal brackets, with hooks of their own that are inserted into special "ears" on the backplate, while the long part of the bracket is attached to hooks in the keycaps; this makes it possible for the key to depress along its entire surface, even if you press down only on one side.
- Exceptions are the space bar (which has four brackets), the ISO enter (which has three), and the Caps Lock (which has only one; I believe it's to avoid interference with the Caps Lock LED)
- Most of the larger keys also use two scissor switches instead of one.
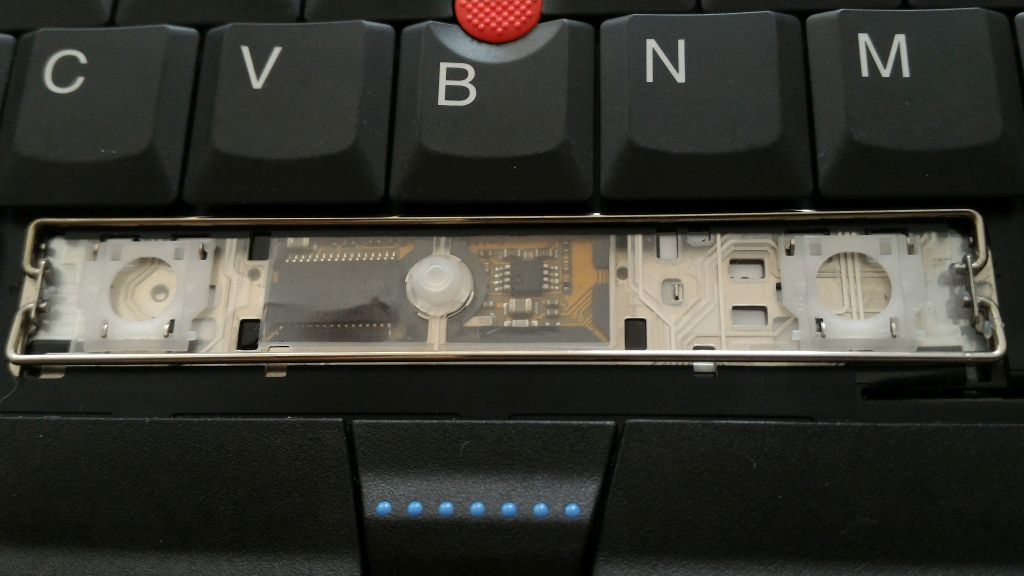
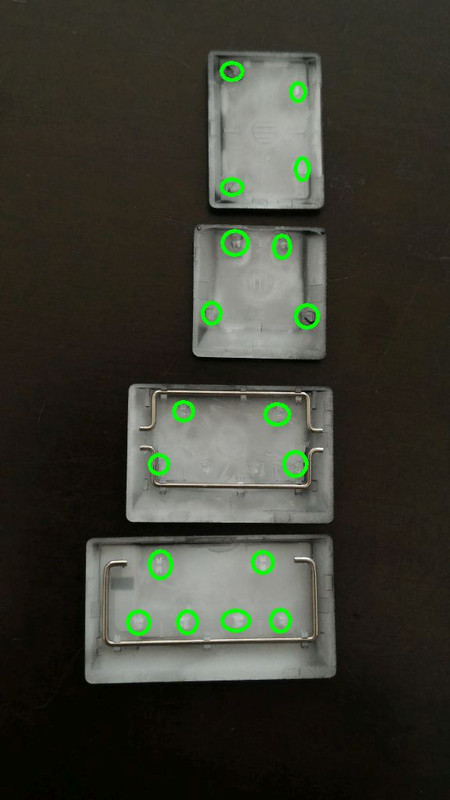
Here are the bottom sides of the different keycaps with some of the brackets attached:
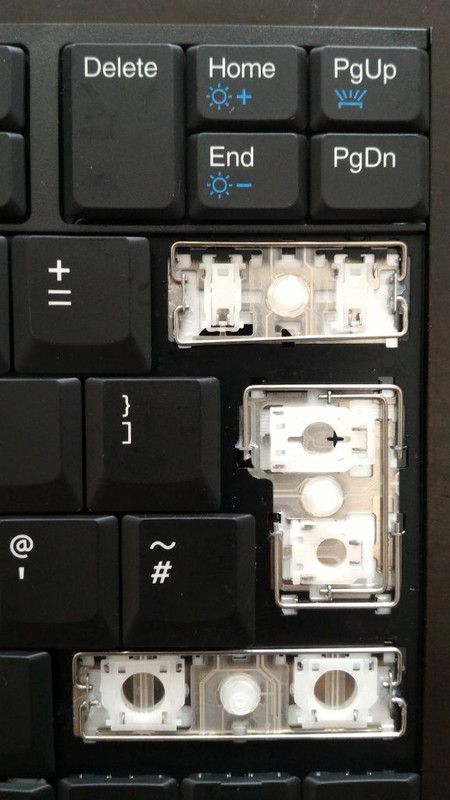
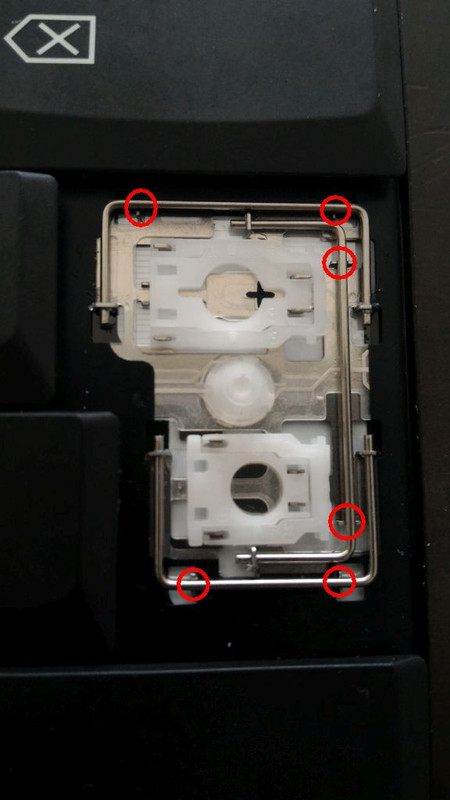
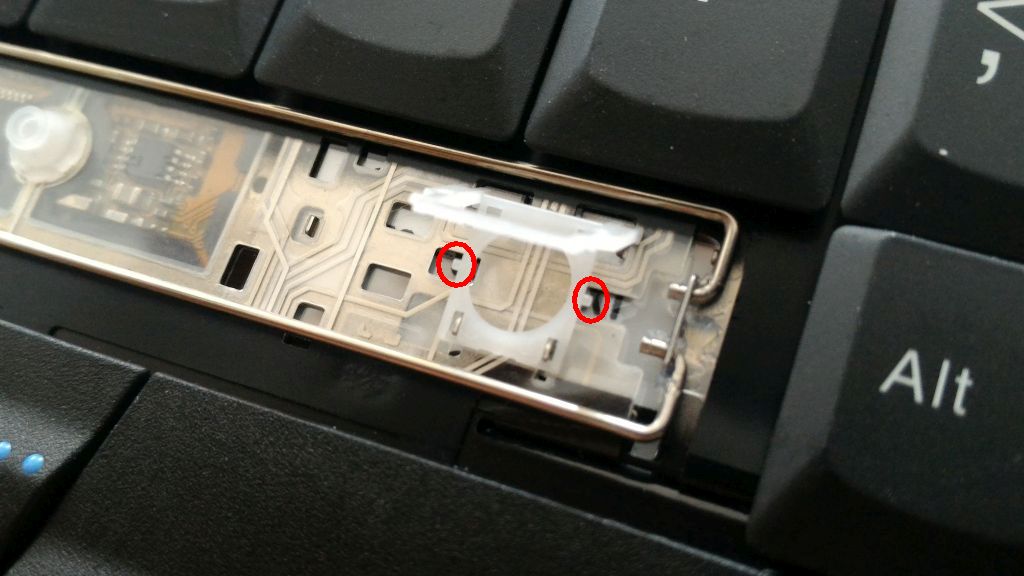
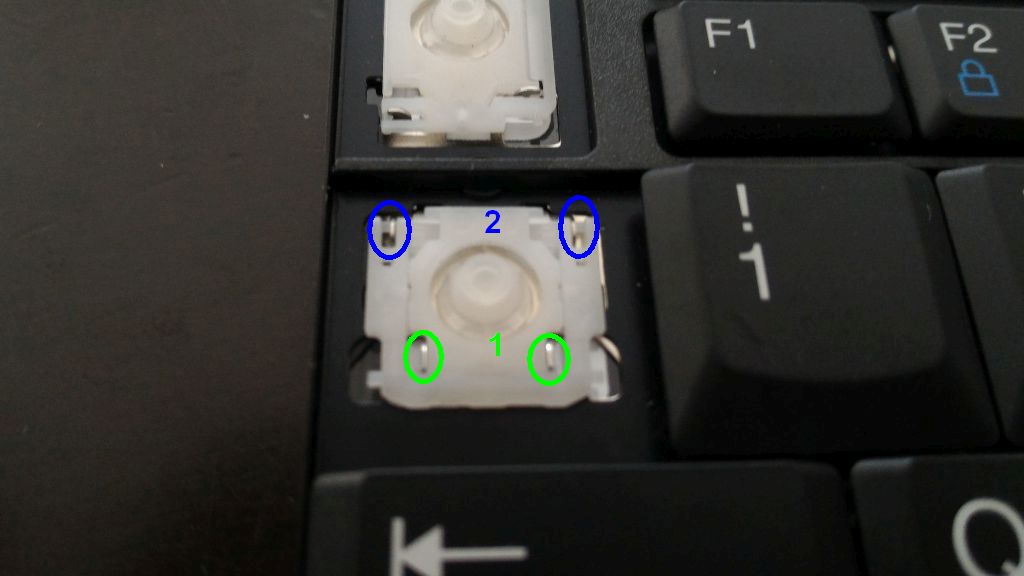
Below, marked with left circles are the locations of the tiny clasps at the bottom of the keycaps, which snap onto the switch as you push the key down. Be careful not to break them, or the key may not attach well; fortunately, they are sturdier than they seem and are unlikely to break unless you twist them. The L-shaped Enter has the most complicated system of brackets, so they have additional guides on the backplate to keep them in proper place; these are marked with red circles.
 --------------------------
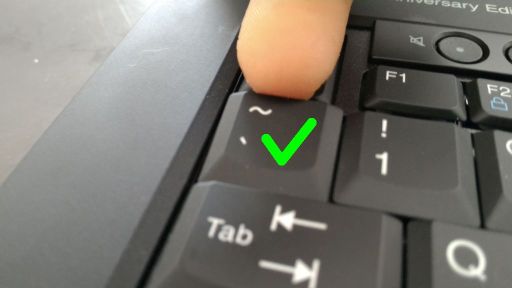
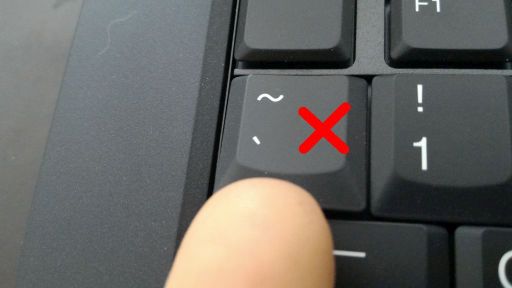
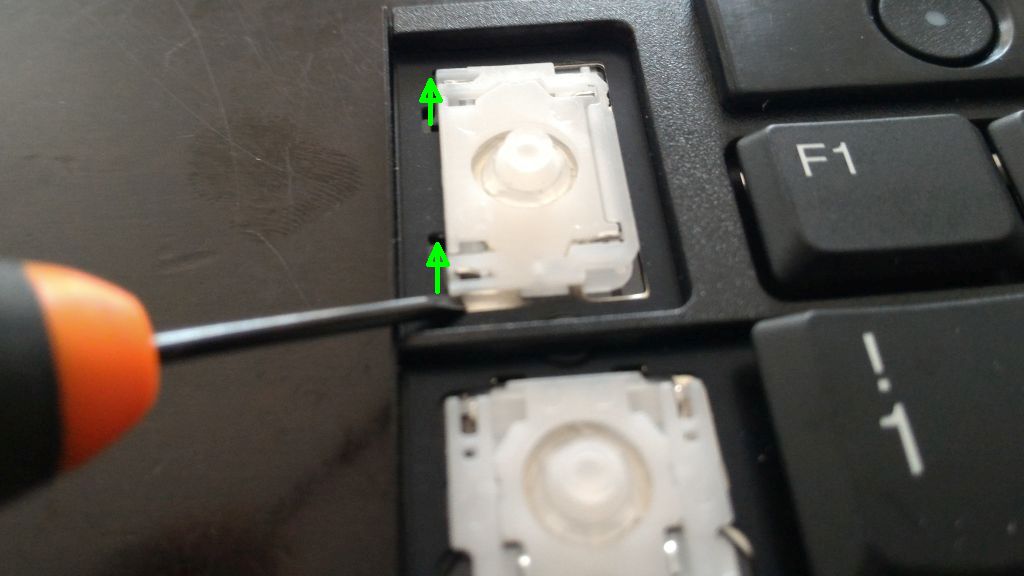
So what did I do wrong when taking the keys apart? Simple. The correct direction for prying the caps for almost all keys on the TP25 keyboard is from the top; this applies to all keys, except the Esc/Del, which have the scissor switch rotated, and so it should be pried from the left; the key cap will come rather easily, and the mechanism will most likely stay in place (and even if it gets displaced slightly, nothing will likely break). However, prying a key from the bottom (or right, for Esc/Del) is likely to break both pins of the scissor switch, which is what happened to me.
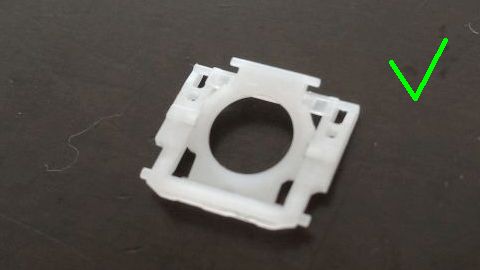
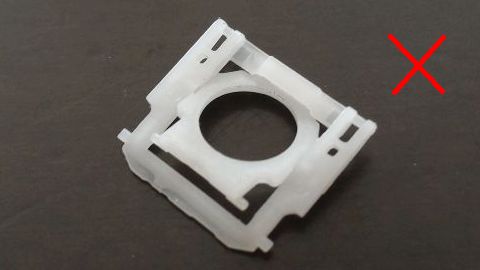
Pictures of what's correct and what's incorrect:


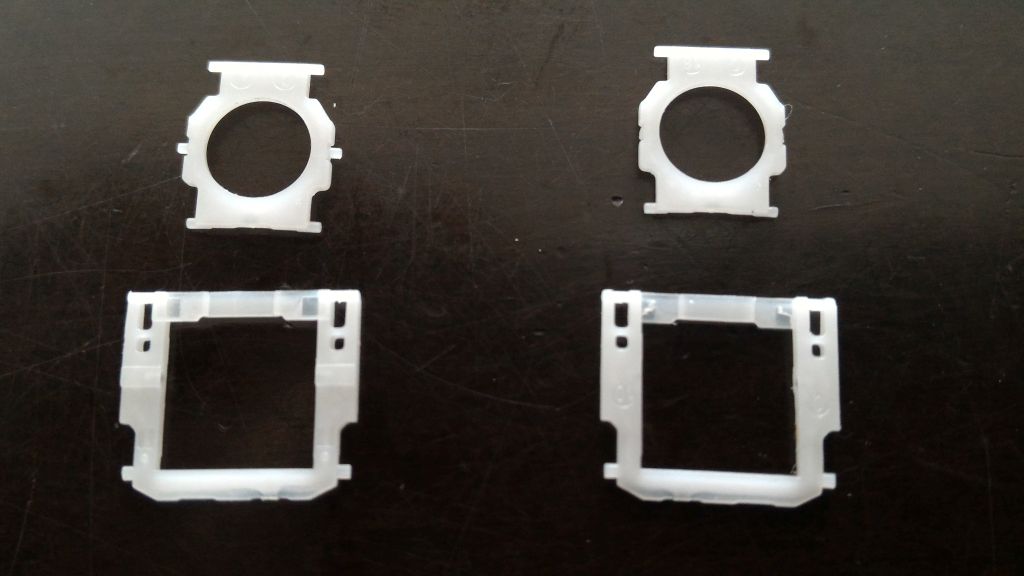
Below are the two switch parts when they are intact (left) and with the pins broken (right). The orientation shown is the correct one for reattaching to the backplate, should you ever need to do it.
Things are a bit trickier with the spacebar and its 4 metal brackets, each attached via multiple clasps. To remove the spacebar the best I can advise is to exercise a good deal of patience - pry a little from the top, on both edges to disconnect the brackets from the clasps, then from the bottom, then from the top, and repeat until all the clasps are disconnected and the cap comes off.
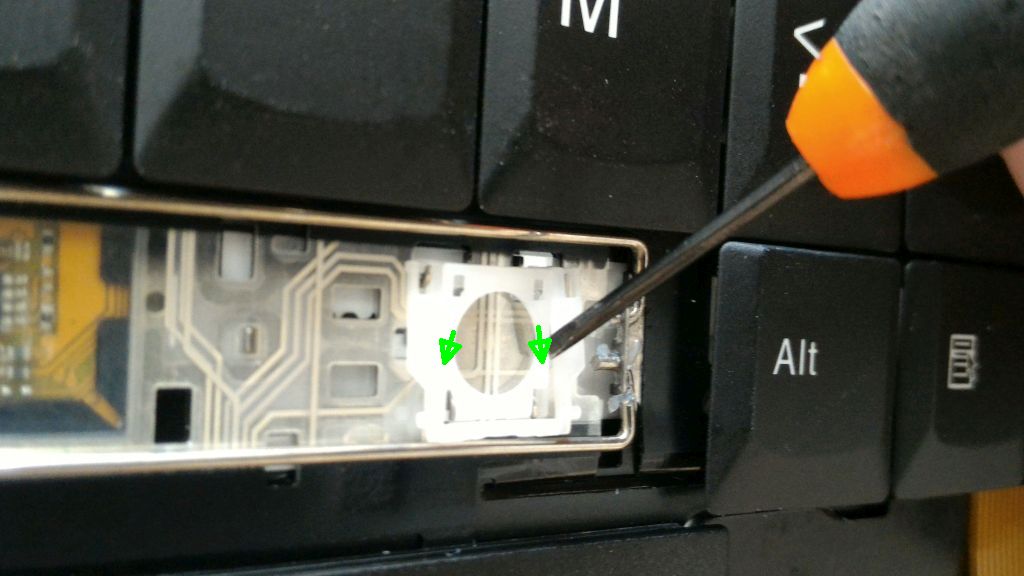
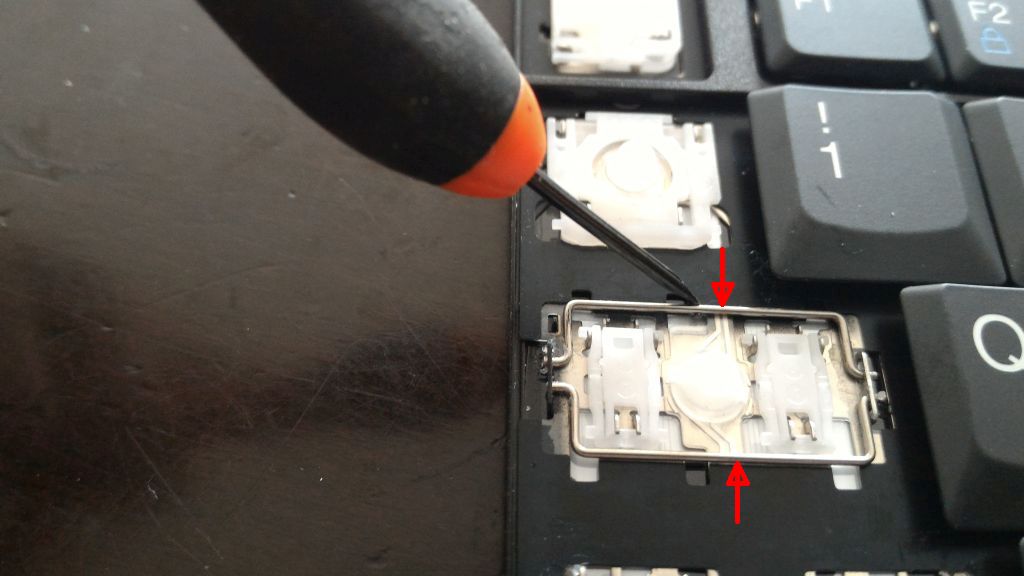
It may happen that one or both of the pins pop out of their holes as shown below:
If the mechanism itself is still attached to the backplate, you can carefully guide the pins back into the holes with a tiny precision screwdriver, as demonstrated. You should hold the outer part of the switch down with your finger while guiding the pins (not pictured, since I had to use the other hand to hold the camera).
What happens if the scissor switch disconnects from the backplate? Well, if the pins are not broken, reattaching it is not so difficult.
First, if the two pieces are disconnected, carefully guide the pins of the inner piece into the holes of the outer piece. Note that the inner piece should go over the outer piece at the top, not under it. If you are not sure which side faces bottom (towards the backplate) and which faces up - try to locate tiny circles with small numbers/letters printed on the plastic pieces - this is the top side.
Next, hook the inner piece around the "teeth" at the bottom of the key, and finally hook the outer piece around the teeth at the top (by gently pressing down). The order is important:
Verify that the switch is firmly in place, align the keycap and gently press down until all clasps catch.
Things are a bit more complicated when you need to install one of the large keys with the metal brackets. It may be possible to first attach the bracket to the keycap, and then try to slide it into the "ears" as you press the keycap down, but what worked well for me is to simply align the brackets in the innermost position, before snapping the cap on top of them, as shown below:
With the large Enter this is less of a problem because of the extra guides on the backplate (as shown above)
Finally, what do you do if you break one of the switches as I did, and need to transplant a good one from a donor keyboard? To disconnect it from the backplate, you can once again use a small precision screwdriver, and carefully pry up the hooks of the outer piece (essentially reversing the order of installation operations). Once those are unhooked, the switch should come off easily (often with both pieces still connected).
BONUS: This is how the keycaps behave if they sit on a broken switch (with the inner and outer piece not connected) - they are still firmly attached, but wiggle:


