Parts needed for the conversion:
- A complete 15" (non wide-screen) T60p
- 42W7873 planar (14.1" non-widescreen T61p, NVS 140M GPU, Penryn-compatible)
- 45N4592 (T500 heat sink assembly, cannibalized for the fan)
- 42W2028 (T61p heat sink assembly for FX 570M, cannibalized for the heat sink portion)
- T6x modem daughter card (hacked up, used to stiffen the GPU mount point on the frame)
- Thermal paste (I used some high-end sheet material left over from a work project, something like AS5 is probably fine)
- Kapton tape (for sealing up the T500 fan in the T61p heat sink, probably not 100% necessary)
- T61p ExpressCard housing
The other specs for this machine:
- Middleton BIOS (thanks TuuS!)
- 8GB PC6400 RAM
- X9000 CPU (SLAZ3)
- Intel WiFi Link 5300 AGN
- Samsung 830 SSD, 256GB
- 38T2829 Super-Multi Drive (seems to work better than the one that came with the T60p)
- SanDisk ExpressCard SD card reader
- Flexview screen (the whole reason that I can't get rid of my T60p!)
- Ultrabay HDD adapter with WD Scorpio Black 750GB HDD
- Windows 7 Ultimate
OK, so swapping the motherboard is very straightforward. Start by removing the T60p motherboard from the frame.
As is well documented on here, you need to grind down the screw bosses below the two modem screw holes. There are no holes in the T61p motherboard to accommodate them. Really, you only need to grind the smaller portion of it off and can leave the larger part, if you put some Kapton tape on the motherboard to prevent the remaining posts from hitting it. If you don't have the tape, then carefully grind the posts off completely. Air blast the frame when done to remove all megnesium shavings.
Next, install the T61p motherboard onto the frame. You'll have two leftover screws because of the previous step.
Great, now reassemble the frame into the bottom tray, and reinstall the screen.
Here's where I took the most time: the heat sink. The X9000 CPU is rated at 44W, which is at 8-10W more than the CPUs offered for these computers. It is well known that the T60p heat sink leaves much to be desired, so I acquired a T61p heat sink for a discrete graphics model and a T500 heat sink from a discrete graphics model. The discrete T500 HSF just doesn't fit nicely, on either the T60p or T61p motherboard and it hits the keyboard. Well, the T61p heat sink fits well enough, and I opted to swap the T500 fan into it.
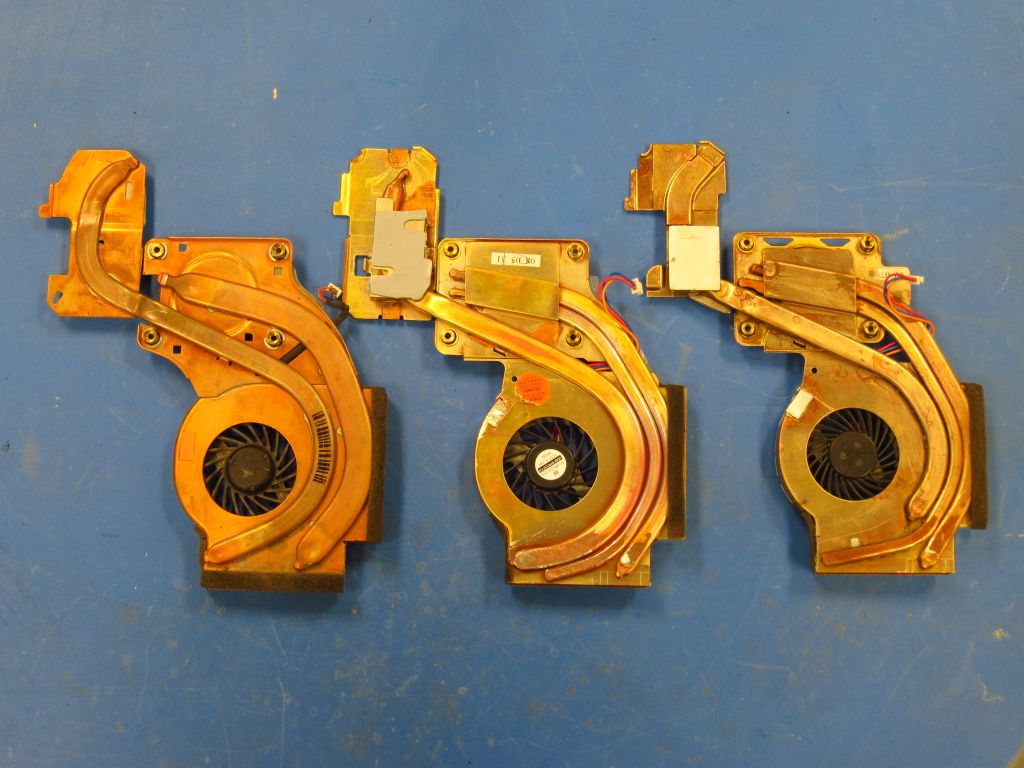
First, here is a comparison of the T60p, T61p and T500 HSFs, left to right. There was a gap pad on the T500 HSF but I removed it. Note that I removed the little copper fins on the heat pipes up around where they sit under the top keyboard bezel. The fins can easily be pulled off with some pliers since they are just soldered on. I also filed them down maybe 0.5mm to clear the bezel.
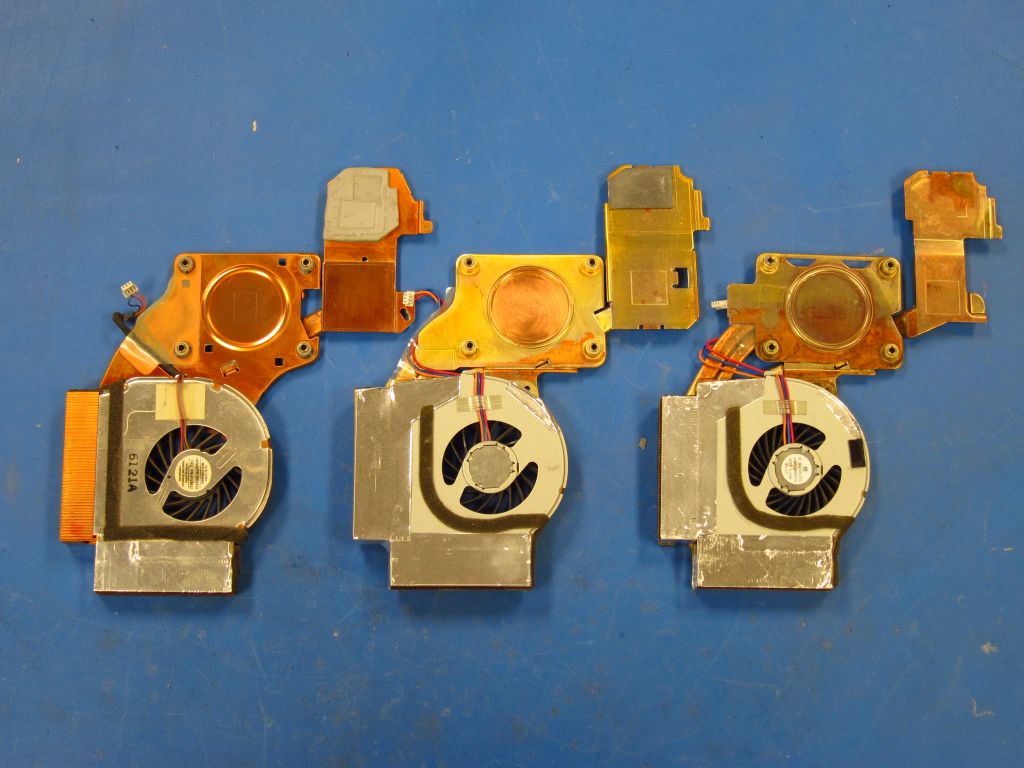
Top view, same order. The fan blades on the T6x HSFs look about the same, while the T500 blades are more compact. I am not sure if this is better or not, but posts in this forum indicate YES.
The T60p HSF GPU portion.
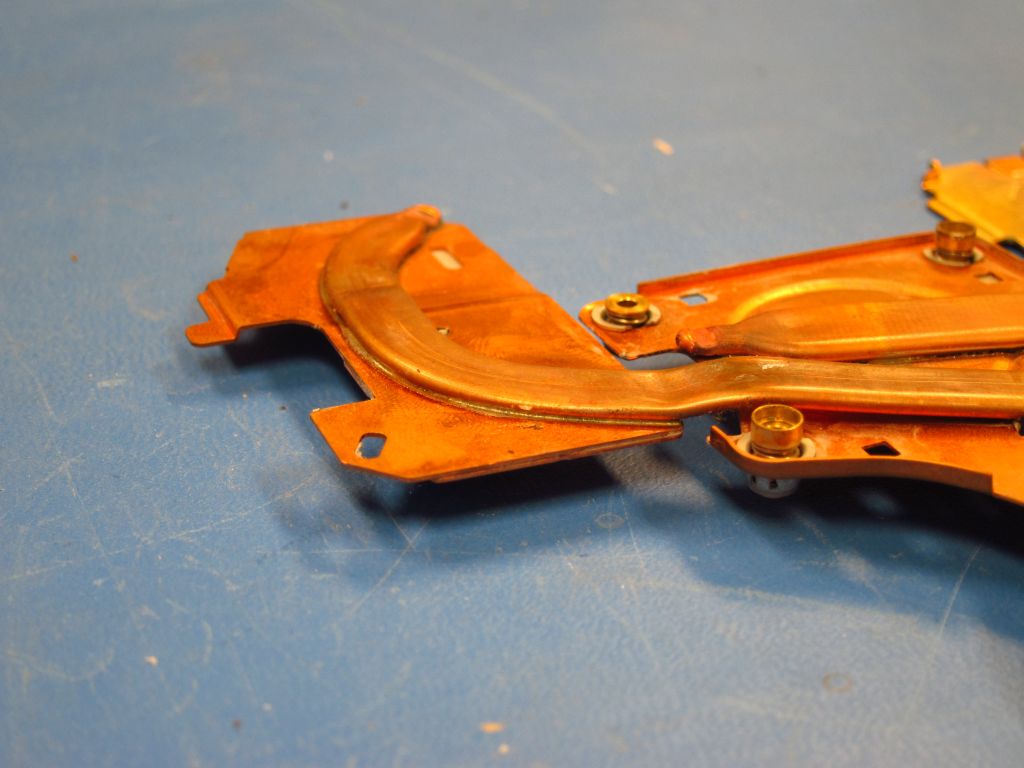
The T61p HSF GPU portion.
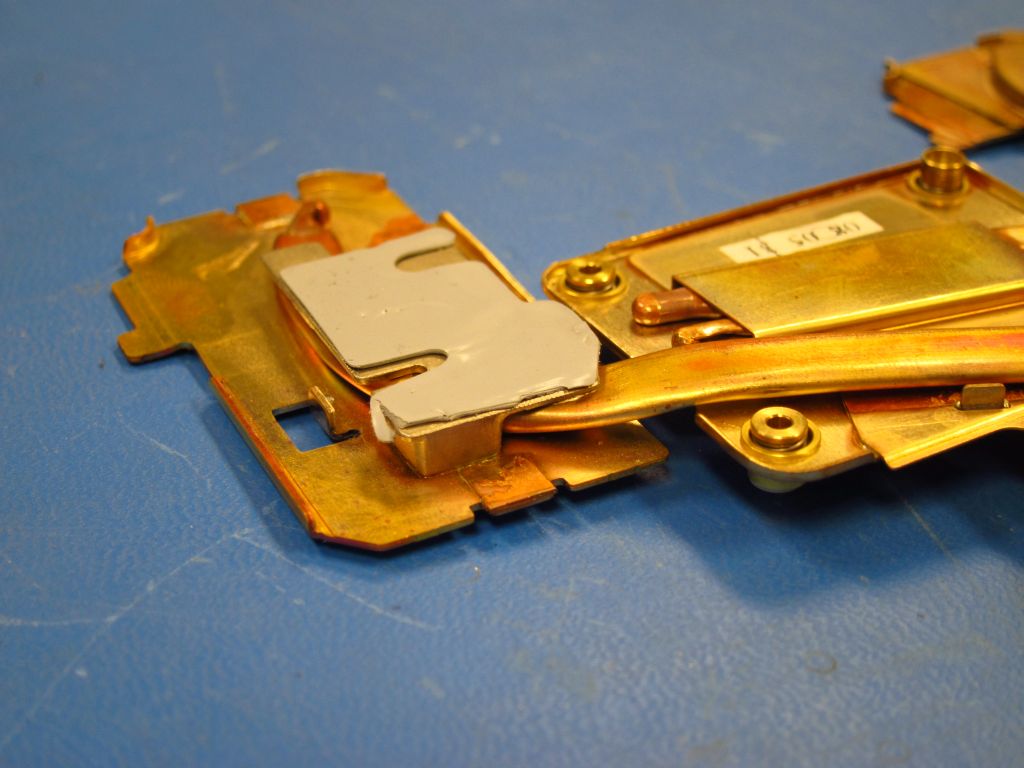
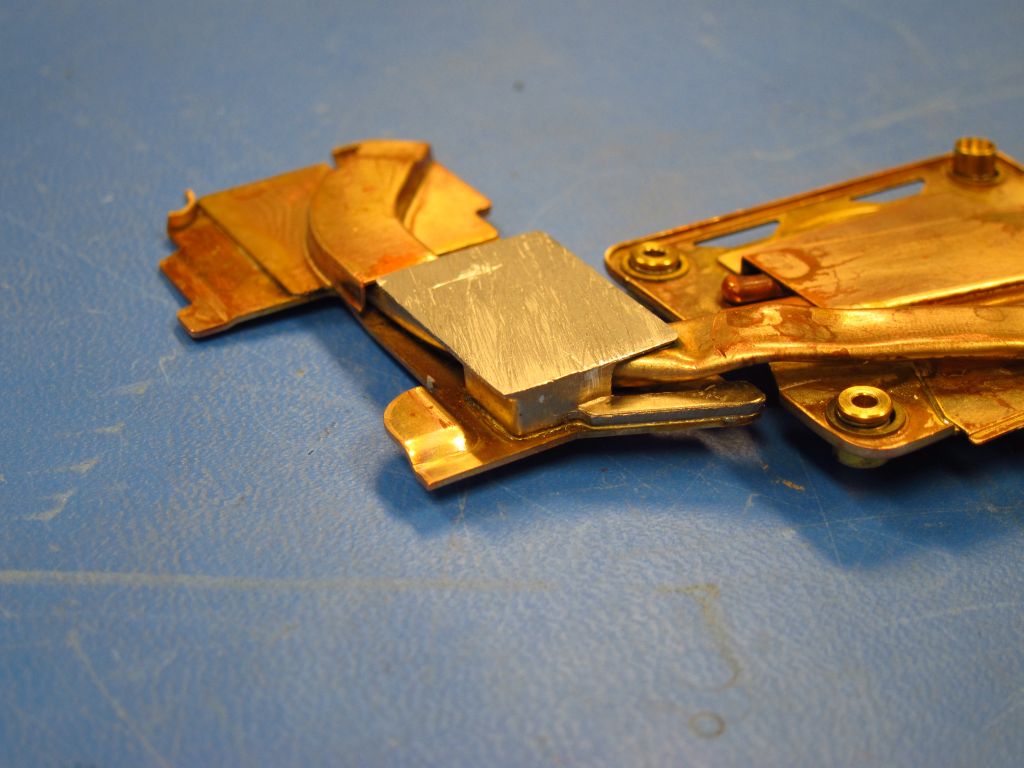
The T500 HSF GPU portion.
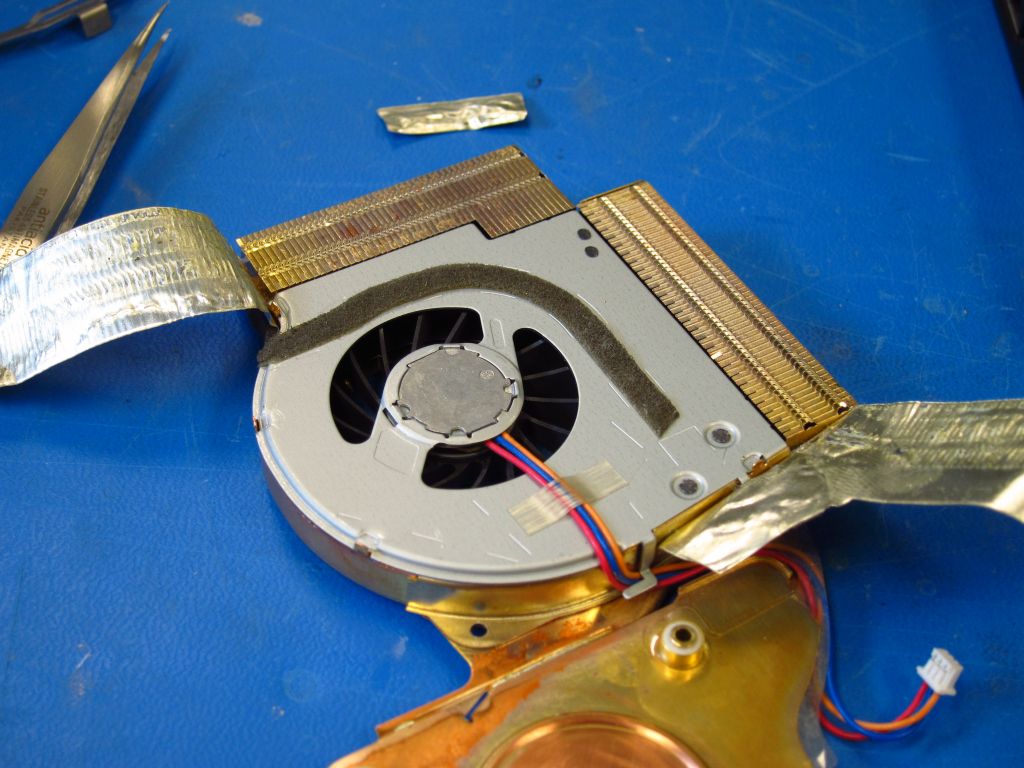
Here is the T500 heat sink being taken apart to harvest the fan. You just have to peel the foil back and use a small flat blade screwdriver to bend the metal tabs. Use a razor to slice the foam tape where needed and lift this out. You must do the same on the T61p heat sink. Be EXTRA CAREFUL when peeling the foil to avoid damaging it! Maybe it doesn't matter, I don't know, but I don't like breaking things.
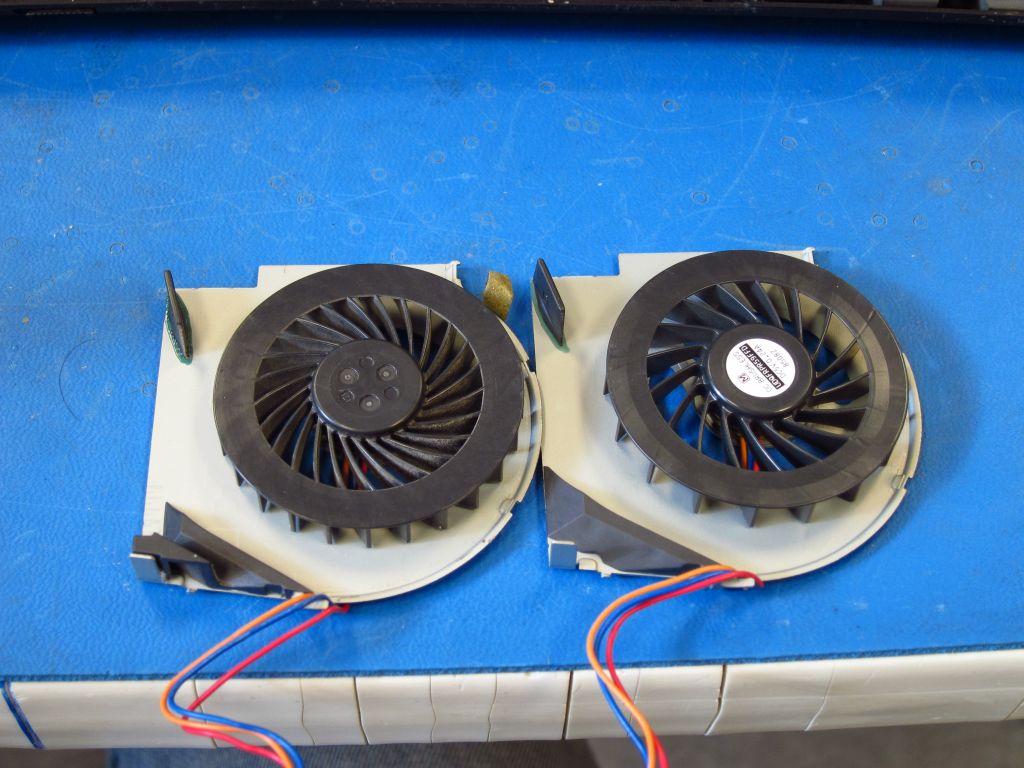
The T500 fan on the left, the T61p fan on the right.
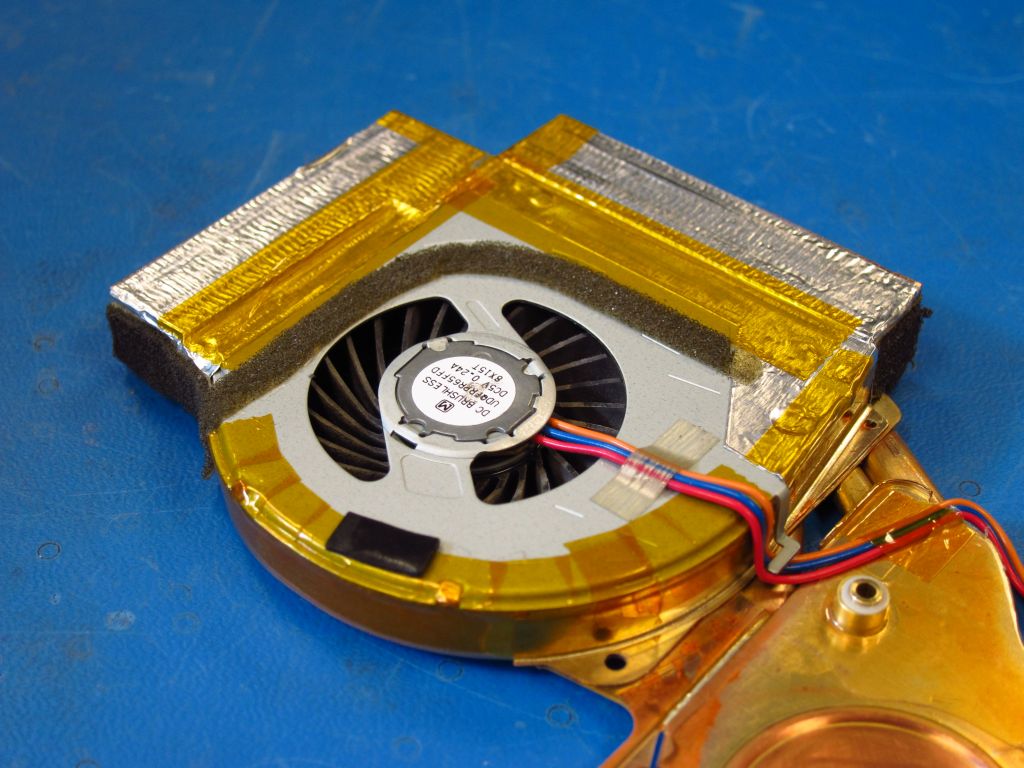
Here is the T500 fan installed in the T61p heat sink. I got a little silly with the Kapton tape sealing all of the gaps and making sure that the foil tape wouldn't lift off (peeling it off seems to weaken the adhesive).
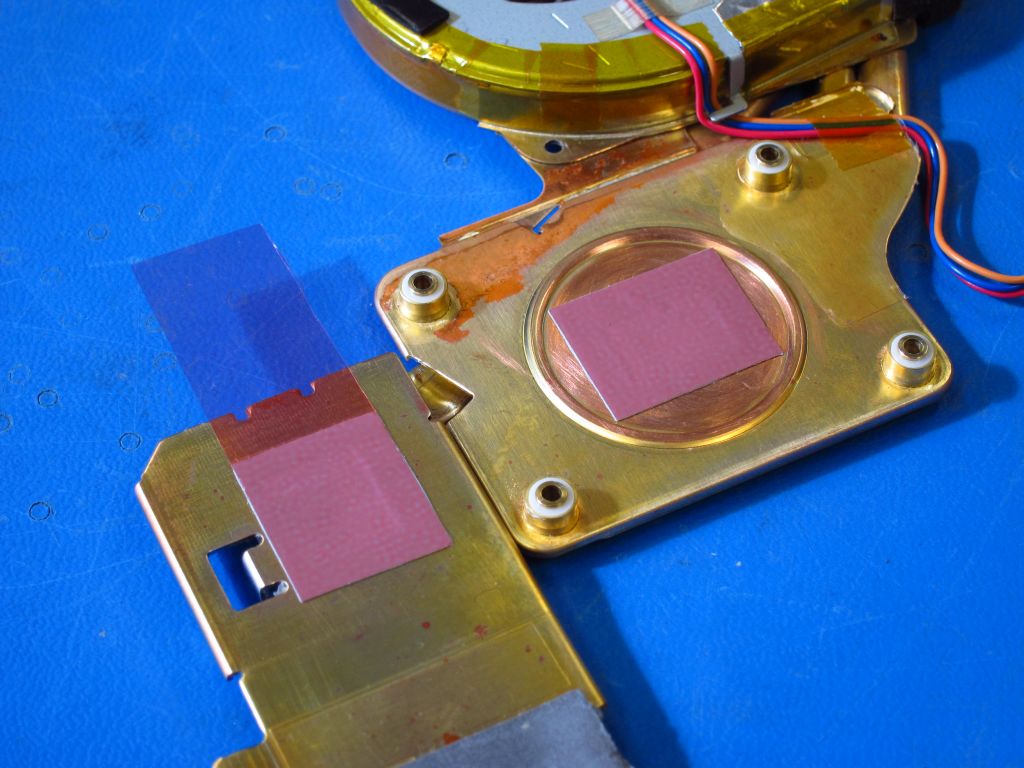
Next, I installed some small sheets of thermal interface material (TIM). The nice thing about this is that it has a plastic backing. I installed it and screwed it down with the backing still on so that I could get imprints of the CPU and GPU to make sure that everything was nice and co-planar. I had to bend the GPU heat pipe a little to get it just right, and then I removed the plastic backing and installed it all.
To minimize interference with the keyboard, you need to file the T60p spring clip a little, as seen in this image. Otherwise, the clip hits the keyboard and produces noticeable bowing.
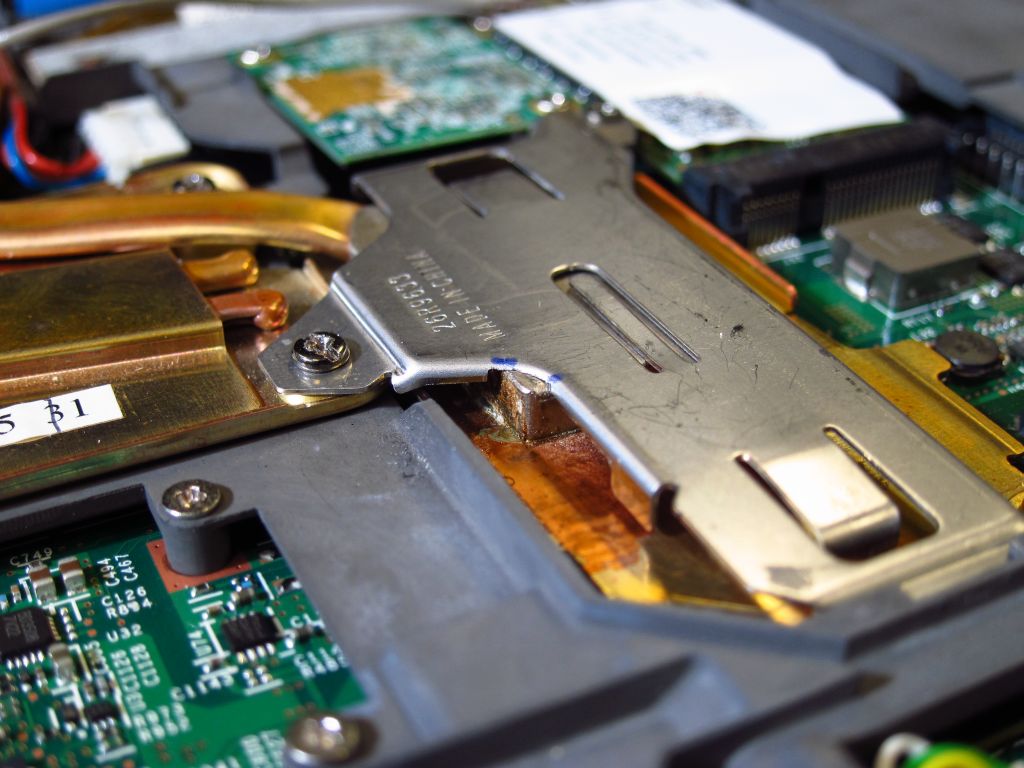
I also put some 0.5mm silicone-based thermal gap pad material on top of the clip so that the keyboard wouldn't be hitting metal. Maybe it doesn't matter, but the T61p heat sink originally had some material there that was contacting the keyboard, so I copied the idea. The clip still hits the keyboard, just barely, but the bowing is almost imperceptible. I can hold a ruler across the keyboard, and it is raised up around the GPU, but only very slightly and not enough to worry me about hurting anything. The T500 heat sink...yeah, I was concerned!
EDIT: I removed the blue silicone pad seen in the picture below. Doing so eliminated almost all distortion in the keyboard.
You'll also notice the modem card in there. I de-soldered the bottom connector since it does not mate to the T61p motherboard. I left it installed to help stiffen/reinforce the magnesium arm that the spring plate screws into. You can see that it is bent upward a little since that part of the frame can't be secured to the T61p motherboard (the hole is in the wrong place). I am probably going to machine a small Delrin bracket to fasten this portion of the frame to the T61p board since there is a hole for it about 5mm away.
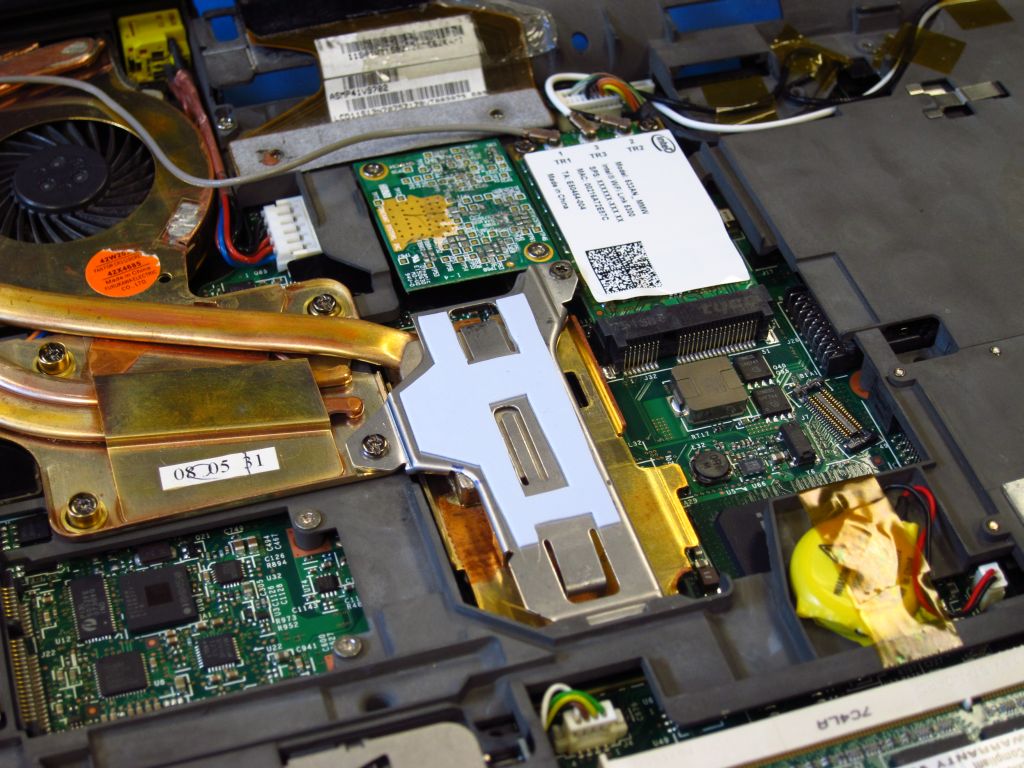
Alrighty, here it all is, ready to go!
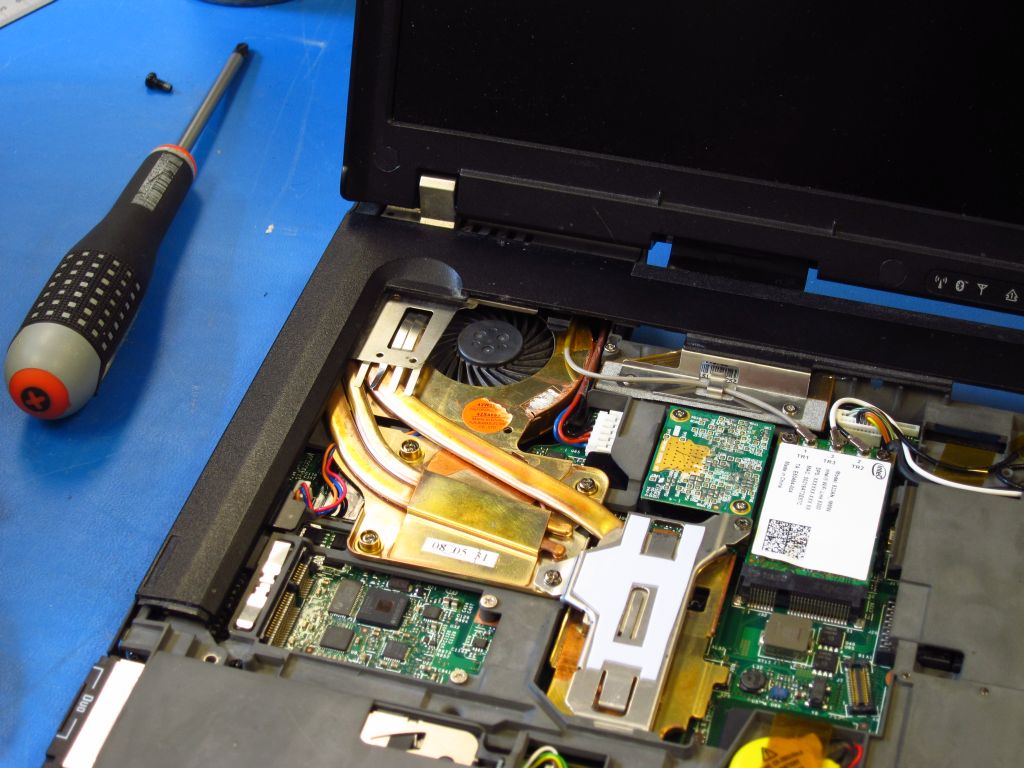
It...is...ALIVE!
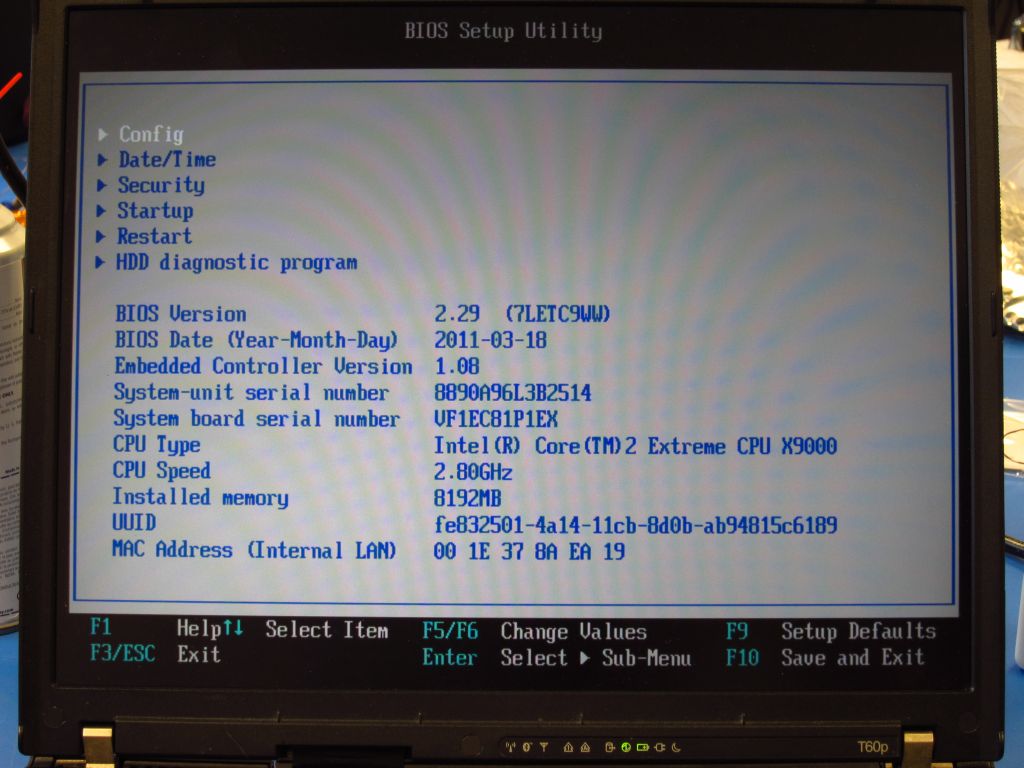
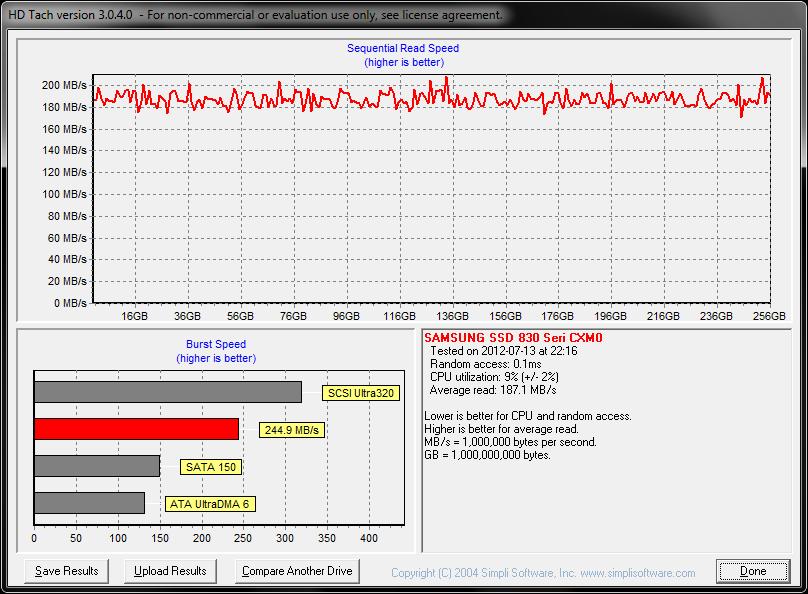
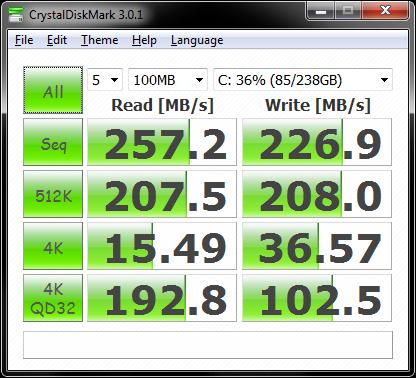
Overall I am very happy with this upgrade. SATA-II speeds really make this SSD shine, and having 8GB of RAM will give me more options when running VMs. The CPU is also noticeably faster, and the GPU is about the same in terms of performance. So, it seems like a worthwhile update to an aging, but capable machine!
What are the temperatures, according to tpfancontrol with the BIOS controlling the fan? In a ~25°C room they are:
Idle, 30 minutes after booting with only tpfancontrol running.
CPU - 42°C
GPU - 45°C
Fan Speed - 2555 RPM (BIOS speed setting 1 / 7)
The CPU was stressed with Prime95 for 20 minutes.
CPU - 97°C
GPU - 79°C
Fan Speed - 3295 RPM (BIOS speed setting 4 / 7)
After that, I ran FurMark for 20 minutes to stress the GPU (and it seems to run one core at 100% which probably pre-heats things a bit).
CPU - 73°C
GPU - 73°C
Fan Speed - 3000 RPM (BIOS speed setting 3 / 7)
The lowest fan speed setting, other than being off, is ~2560RPM. It is definitely quieter than the stock T60p fan, although I would not call it inaudible. tpfancontrol does allow me to run the fan in "smart" mode which basically keeps the fan off at idle and the CPU/GPU at 58°C/61°C. I'll just let the BIOS do its thing though since lower temperatures will hopefully mean a longer life.
Under Prime95 stress, the X9000 CPU gets almost as hot as the T7600 I had in my T60p (~99°C). Considering that the X9000 burns up 26% more power than the T7600 (44W vs 35W), I guess that it is a testimony to the fact that the T61p heat sink is indeed better. This is on stock voltages of course, and I will play around with undervolting later tonight to see if I can drop things measurably.
During the GPU test I suppose that it is not too surprising that the GPU doesn't get any hotter than the CPU. I believe that the NVS 140M GPU is rated at 10W, which is probably not much more than the CPU at idle lol.
Can anyone comment on the accuracy of tpfancontrol? I get vastly different temperatures from RMClock and FurMark. For now I assume that the ThinkPad-specific application will give the most accurate readings, but I really don't know if that's true. Thanks!
EDIT July 18, 2012
I did some GPU benchmarking and have a couple of things to report.
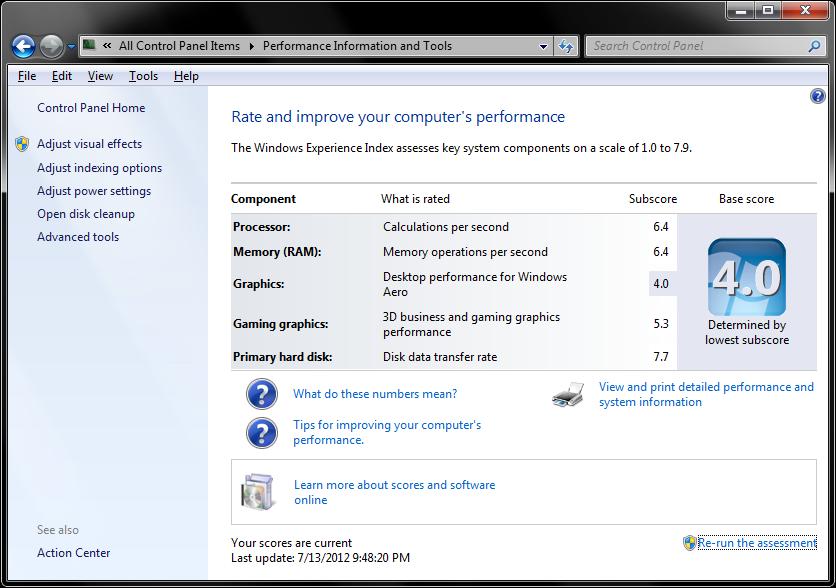
Video Drivers: I did some testing after member TuuS gave me some links to discussions about nvidia drivers. A thread on the Lenovo forums indicated that installing the latest Lenovo video drivers (from 2009) for the NVS 140M and THEN installing the latest ones from nvidia's site (296.88 is latest as of today) over the top of them would give some performance benefit. I ran tests using only the old Lenovo driver, the old Lenovo driver with the latest nvidia ones installed on top of them, and the latest nvidia ones with a clean system / no old video drivers.
- Old Lenovo Drivers: Windows Experience Index (WEI) 3D score of 4.2, 2D score of 4.0. 3DMark 2000, 3DMark 2001 and FurMark scores about the same as the newer nvidia drivers, but 3DMark 2006 crashed due to a driver error of some sort.
- Old Lenovo Drivers + New nvidia Drivers: WEI 3D of 5.3, 2D of 4.0. 3DMark 2000, 3DMark 2001 and FurMark scores remained about the same (maybe 1-2% higher, but that could be the margin of error). 3DMark 2006 was able to run fine though, likely because the new drivers properly support modern DX features.
- Clean Install of New nvidia Drivers: Exact same performance as installing them over the top of the old ones. I recommend this just because it is faster and easier than installing drivers twice.
Overclocking: Per online resources, the NVS 140M is basically a de-tuned GeForce 8400M GT with OpenGL-optimized drivers. It only dissipates ~10W, which considering that the HSF I installed was intended for a FX570M at 35W, means that there should be considerable thermal headroom, even with my X9000 CPU burning 9-10W more than any CPU intended for the system. I OC'ed with RivaTuner as it is probably the easiest and most hassle-free program I can think of to do it with. I only used FurMark since it is faster and simpler than the 3DMark series and is very stressful on the GPU. From reading around the web, it seems that the NVS 140M overclocks like crazy, possibly because nvidia was binning the G84M dies and only selected the lowest power ones for the workstation variant of the 8400M.
Stock Settings
400MHz Core
800MHz Shader Clock
600MHz Memory
Results after 20 minutes running FurMark:
1569 frames rendered
GPU temperature (via tpfancontrol) of 71°C
Fan spinning at 3100RPM (fan at setting 3 of 7)
Overclocked Settings
600MHz Core
1200MHz Shader Clock
900MHz Memory
Results after 20 minutes running FurMark:
2366 frames rendered
GPU temperature (via tpfancontrol) of 76°C
Fan spinning at 3100RPM (fan at setting 3 of 7)
Performance scales directly with clock speeds, which is really nice! The temperature of the GPU remains pretty darn low overall, which gives me confidence in this. I will actually be pushing this GPU to the highest setting I can before stability is lost, but RivaTuner is limiting me to 50% clock speed OC and I need to remove the safety governor. Other people on various forums have pushed the core speed to ~750MHz and the memory to almost 1GHz!
CPU Undervolting
Using RMClock to control the CPU core voltage, I was able to get a stable system with the CPU at 1.075V, versus the stock setting of 1.200V. Under a heavy load, running Prime95's Small FFT test for 30 minutes, my CPU temperature dropped from 94°C to 82°C. Nice! Undervolting is a great way to lower temperatures, increase battery life and all with no performance impact (as long as you don't go so low that the system freezes). Temperatures were monitored with tpfancontrol since RMClock seems to give inaccurate readings.
Speaking of battery life, it sort of sucks. This is not a surprise, or a complaint really...tossing in a Core 2 Extreme CPU and overclocking the GPU are not exactly battery-friendly moves on my part. The laptop is used while plugged in 90% of the time anyway. I can get just under 2 hours of web browsing in on the battery, with some YouTube mixed in. The T60p mobo + V5200 GPU + T7600 CPU would get me about 2.5 hours of battery life, so really there isn't much of a decrease here, especially considering that the performance of the Frankenpoad is waaaaay better. Laptops of this era all seem to have had low battery life, particularly high performance ones, so it's all good as far as I am concerned. If I wanted endless hours of web browsing, I would probably get a tablet or something.


