


So I decided to build my own, like forum user TPFanatic did. My end goal was a bit different than that of TPFanatic, my goal was to build an almost indistinguishable from real ThinkPad 25, closer to the budget of a real 25.
The hardest thing of the project was sourcing parts, as ThinkPad 25 parts are getting more and more rare.
I bought the following parts for this project (prices in euro and usd):
- T470 i7 7600U I got cheap because of a BIOS issue which I resolved - €60
- T25 palmrest 01HX686 - AliExpress - €36,15
- X1 Carbon Gen 6 glass trackpad 01LV568 - AliExpress - €15,13
- T25 Japanese keyboard 01HW517 - AliExpress - €50,43
- T25 power button ribbon cable 01HX688 - AliExpress - €19,29
- T25 lid 01EN969 - AliExpress - €34,51
- T25 power button board 01HX689 - Lenovo Parts store EU - €41,16
- T25 power button/volume button cover 01HX690 - Lenovo Parts store EU - €44,03
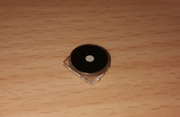
- T25 IR webcam module 00HN374 - Lenovo Parts store EU - €13,90
- T25 IR LCD bezel 01AX956 - Lenovo Parts store US - $9.66
- T25 bezel sticker 01HX687 - Lenovo Parts store US - $41.47
Most of the time of this project went into sourcing parts.
The 01HX690 cosmetic power button/volume button cover was the absolute hardest to find, I spent months looking at Lenovos parts store until it suddenly came available.
The 01HX687 also was hard to find, it only was available at the Lenovo US parts store so I had to import it.
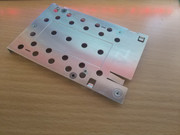
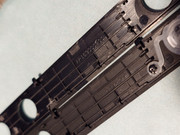
I ordered a "DT475 cable + button board" from AliExpress, which should've been a combination of 01HX688 power button cable and 01HX689 power button board like in the picture, but I only received the flex cable, so I ordered the power button board seperately from the Lenovo Parts store.
The T25 keyboard worked plug and play for me on the T470 motherboard.
While assembling I noticed that some T25 specific parts had "DT475" on them like the power button cable, power button board and palmrest. T470 parts have "CT470" on them, so ThinkPad 25 was probably named T475 internally at Lenovo.
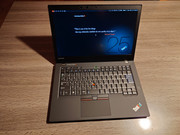
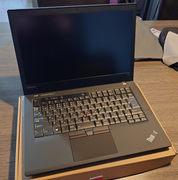
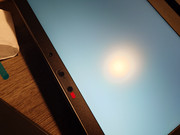
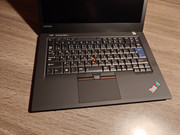
The only notable things differentiating this ThinkPad from a real ThinkPad 25 is the CPU/GPU combination, which is now an i7 7600U with IGPU instead of an i7 7500U with GeForce 940MX in the real 25. Also, the screen is not a touch screen as seen on the real ThinkPad 25, but it is 1080p IPS. The resulting ThinkPad is still expensive, but cheaper than importing one from eBay. Most visible parts are new, (palmrest, keyboard, trackpad, LCD bezel, LCD lid), and the others are in good shape (screen, bottom cover).
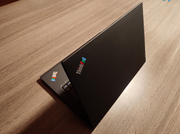
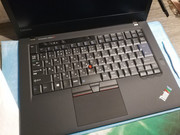
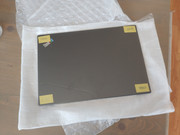
The resulting ThinkPad:
The build log
Preparation
I started with preparing some components. I did not buy a T25 M.2 bracket, (they are different from the T470 and T480) so I started modifying the one that was in the T470 so that it would fit in the T25 palmrest. I used T25 Frankenpad from Xytech as a guide for this.
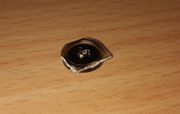
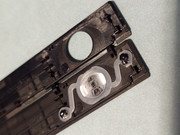
I also used this as a guide for modifying the plastic power button. Most T25 keyboards come with a simple non-coated power/volume button cover for shipping. The plastic volume buttons are included, but the power button would normally be mounted to the actual volume/power button cover. These complete parts very hard to find, so a workaround is to use the power button from a xx30 keyboard. The idea is to cut it so that it would be small enough to fit, and cut the plastic peg off the longer plastic piece, and glue this piece to the bottom so that it makes contact to the power button PCB. This solution is not optimal as the power button wil spin around in its spot, and the light diffusion from the power LED is bad. This modification ultimately wasn't needed for me, as I was able to source the cover with button included (01HX690).
Assembly
Starting with a stock T470, I started with removing everything until and including the palmrest (1220 Keyboard bezel assembly), so until only the LCD assembly is left. Using the T470 hardware maintenance manual for this is possible.
Starting with the T25 palmrest, it's a matter of reversing the steps (starting from 1210 Keyboard bezel assembly) from the T25 hardware maintenance manual.
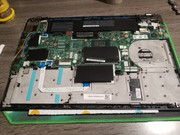
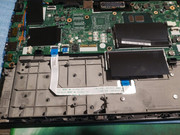
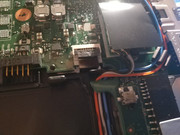
Luckily, I was able to use the fingerprint reader module from the T470.
The X1C Gen 6 trackpad I used had built-in NFC, which couldn't be used, so I removed the cable. I used screws from the T470 to mount the trackpad.
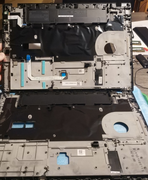
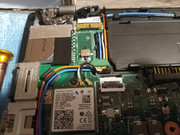
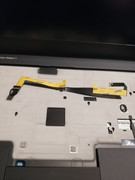
Antenna cable routing:
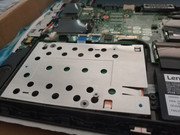
Power button cable installed and stuck down using the included double sided tape:
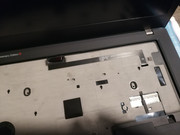
Power button PCB stuck down to the keyboard using the included double sided tape:
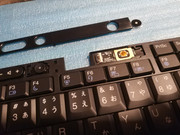
Installing the keyboard to the palmrest and resting the modded X230 plastic power button on the power button PCB:
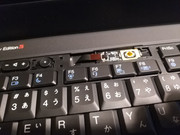
Installing back the plastic shipping cover to the keyboard:
Installing the SSD using the DIY M.2 SSD bracket:
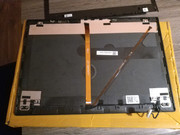
I wanted it to look more like an actual T25, so I ordered a lid back cover 01EN969 to get the colorful T25 logo. Getting the logo separately as a sticker would also be possible, but I couldn't find any source for them.
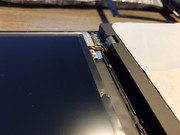
Removing the lid from the base and removing the display:
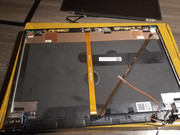
Everything from the old lid needed to be removed, including the antennas, flex cable and webcam module.
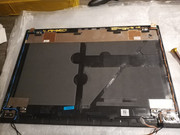
And reapplied to the T25 lid:
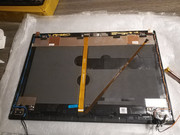
The logos match now:
Until this point, the process was done with difficult- but not impossible to find parts. The result is a close T25 replica with the T470 text and still some room for improvement.
The process of searching for components continued, and I randomly managed to find the T25 power button/volume button cover 01HX690 on the Lenovo EU Parts store.
I imported the 01HX687 T25 LCD bezel sticker from the US Parts store, as it was not available here.
After the parts arrived, the build continued.
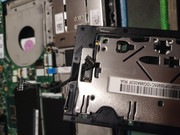
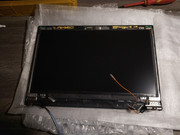
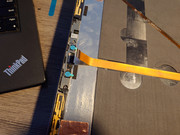
Removing the bezel and LCD panel again:
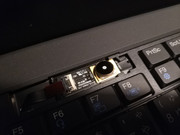
Removing the old webcam board and replacing it with a new board with the IR camera (00HN374):
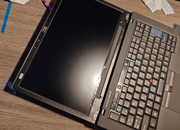
Installing the LCD panel and the bezel with the cutouts for the IR camera (01AX956):
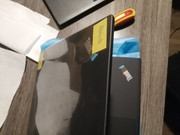
Sticking the T25 LCD bezel sticker (01HX687) down to the middle bezel. Making sure to align this properly!
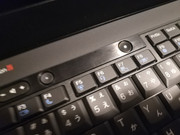
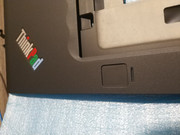
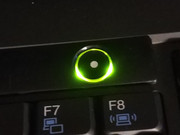
The finishing touch is the 01HX690 power/volume button cover instead of the plastic shipping cover that came with the keyboard.

The shipping cover without the power button seems to be the same part but in an earlier production stage:
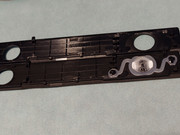
For some reason, a lot of the side clips are cut off on the shipping cover. Probably because it can be removed more easily from the keyboard to replace it with the actual part.
Installing the new cover finishes the machine:

This overall was a nice project to do, and I am glad with how it turned out.
